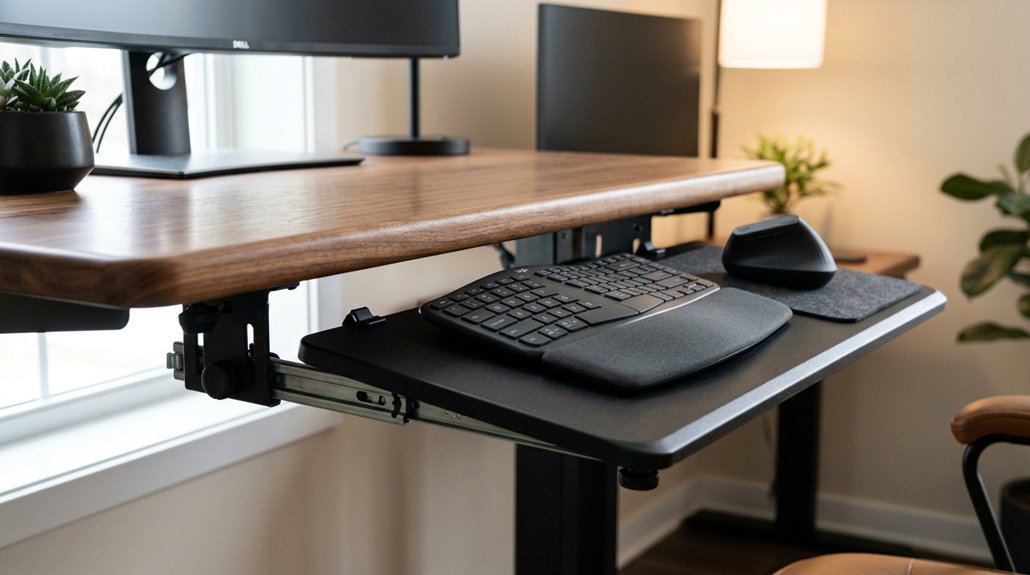
To position your keyboard tray correctly, set it at or just below elbow height so your forearms stay parallel to the floor. Keep elbows bent around 90 to 100 degrees with relaxed shoulders, and avoid overreaching by keeping the keyboard close. Tilt the tray slightly between 0° and -10° for a neutral wrist posture. Confirm your mouse is at the same height and within easy reach. Regularly reassess your setup during sit-stand changes to prevent fatigue—more tips await to improve your ergonomic setup.
Why Proper Keyboard Tray Positioning Matters for Comfort

Proper keyboard tray positioning is essential because it directly affects your comfort and the health of your musculoskeletal system. When your keyboard tray is at or just below elbow height, your forearms stay parallel to the floor, reducing strain on your shoulders and neck. A neutral wrist position, where your wrists remain straight, helps prevent discomfort and lowers the risk of musculoskeletal disorders like carpal tunnel syndrome. Avoid positive tilt, which forces wrist extension and increases pressure on your carpal tunnel by up to 77%. Instead, opt for a negative tilt or a flat surface to promote a natural, relaxed posture. Ensuring your tray has the proper adjustability options allows you to fine-tune its position for optimal ergonomic benefits. Correct positioning guarantees your arm muscles stay relaxed and reduces fatigue, making long typing sessions more comfortable and safer for your overall health.
How to Assess Your Natural Posture Before Adjusting the Tray
Before adjusting your keyboard tray, take a moment to evaluate your natural posture, as this provides a baseline for a comfortable and ergonomic setup. Sit with your back fully supported, feet flat on the floor or footrest, and thighs parallel to the floor.
Relax your arms naturally at your sides, then bend your elbows to approximately 90–100 degrees; this helps you gauge the ideal height for your keyboard. Close your eyes and let your arms and wrists fall naturally to avoid visual bias, ensuring a relaxed, neutral position.
Check that your shoulders are relaxed, not hunched. Confirm your forearms are roughly parallel to the floor with wrists straight and hands level or slightly lower than elbows. This assessment guides proper keyboard tray placement for peak comfort. Incorporating adjustable tilt features can further optimize your setup to maintain a neutral wrist position and reduce strain.
Find the Best Height to Keep Your Elbows at 90 Degrees
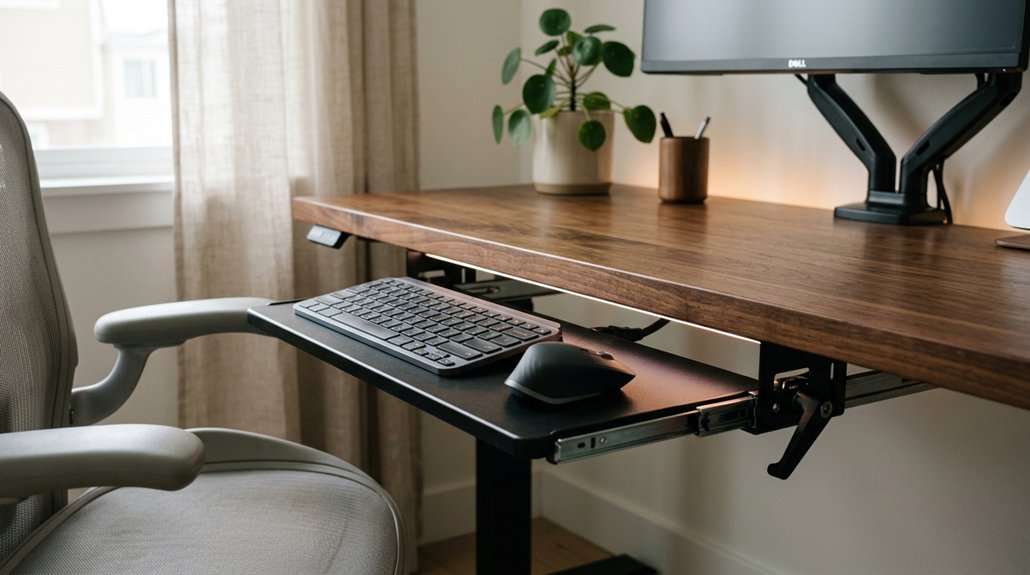
Once you’ve evaluated your natural posture, it’s time to find the right height for your keyboard tray so your elbows stay at a comfortable 90 degrees. Use keyboard trays with adjustable height features to easily fine-tune your keyboard position.
Sit with your elbows bent at about 90 degrees and guarantee your forearms are parallel to the floor during typing. Adjust your keyboard height so that the surface aligns just below or at your elbow level, helping maintain proper ergonomic setup.
Keep your elbows close to your sides without raising your shoulders, which reduces strain. Regularly test the tray height by relaxing your shoulders and arms, making sure your wrists stay straight and your elbows remain near 90 degrees for peak comfort and ergonomic benefits.
Make Sure Your Keyboard Is Close Enough to Avoid Overreaching
To prevent shoulder and neck strain, make sure your keyboard is positioned close enough to your body so you don’t have to overreach. Properly adjusted keyboard trays help maintain a comfortable keyboard distance, avoiding extended arms that cause fatigue. Using a height-adjustable stand allows for precise positioning to suit your ergonomic needs.
Here are three tips:
- Keep the keyboard within 10–20 cm of your body to prevent overreaching.
- Position the keyboard so your elbows stay by your sides with a natural 90-degree bend.
- Use trays with slide or clamp-on features to easily adjust the keyboard distance as needed.
A correctly positioned keyboard reduces the risk of shoulder and neck strain by maintaining proper alignment and minimizing overstretched muscles. Focus on keeping your keyboard close and at the right height for ongoing comfort.
Adjust the Tray Tilt to Keep Your Wrists Neutral
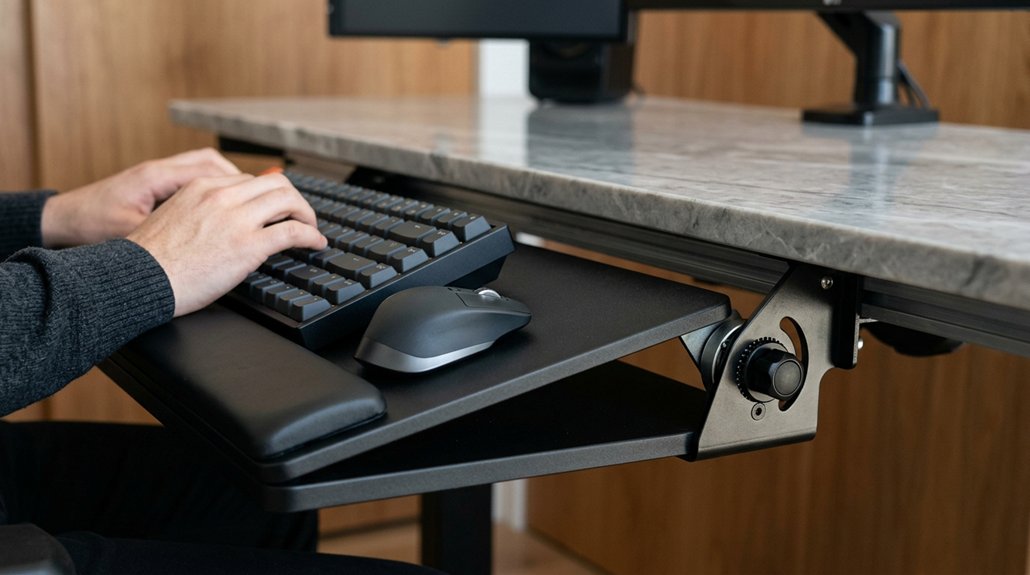
Adjusting the tray tilt is essential for keeping your wrists in a neutral position and reducing strain during typing. Set your keyboard trays to a slight negative tilt, around 0° to -10°, to prevent wrist extension and maintain a relaxed posture. Avoid positive tilt angles, as they force your wrists into an extended position, increasing the risk of repetitive strain injuries like carpal tunnel syndrome. A well-designed ergonomic contour, such as a sloped or grooved surface, further supports wrist neutral alignment and promotes comfort. Regularly fine-tune the tilt throughout the day, especially when switching between sitting and standing. Proper tilt adjustment supports keeping wrists in line with forearms, minimizing strain and promoting comfort during long typing sessions.
Use the Tray’s Adjustable Features to Customize Your Setup
Take advantage of your tray’s adjustable features to create a comfortable ergonomic setup. Adjust the height so your keyboard is just below elbow level, and set the tilt for a slight negative angle to reduce wrist strain. A long-lasting rechargeable battery in some ergonomic keyboards can support extended use, so choose a setup that allows you to make frequent adjustments without hassle. Don’t forget to position your mouse and tray components to keep everything within easy reach, maintaining proper posture as you work.
Adjust Tray Height
Using the tray’s adjustable height features allows you to create a workspace that supports proper ergonomics and reduces strain. To optimize your keyboard trays, follow these steps: 1. Adjust tray height so your forearms and hands align with your elbows bent at about 90°, placing the keyboard at or just below elbow level. 2. Use the adjustable settings to maintain a neutral wrist position, avoiding wrist extension or excessive bending. 3. Incorporate a slight negative tilt (-5° to -10°) to help sustain ergonomic alignment, reduce wrist strain, and promote comfort. 4. Adjustable angles and height modifications are essential to tailor your setup for maximum ergonomic benefit. Regularly recheck and fine-tune the height when switching between sitting and standing; this guarantees your shoulders remain relaxed without hunching, supporting ongoing ergonomic health.
Set Proper Tilt Angle
Setting the correct tilt angle on your keyboard tray is essential for maintaining a neutral wrist position and preventing strain. Most ergonomic keyboards work best with keyboard trays set at a negative tilt between 0° and -10°, which helps keep your wrists straight and relaxed.
Avoid positive tilt angles, as they can force your wrists to bend upward, increasing the risk of discomfort and carpal tunnel syndrome. Use the tray’s adjustable tilt feature to find a comfortable position that supports proper wrist and arm alignment, whether sitting or standing.
Regularly recheck and fine-tune the tilt to guarantee your setup remains comfortable during long typing sessions and accommodates any slight changes in your body position. This simple adjustment promotes better ergonomics and reduces strain.
Optimize Peripheral Placement
To optimize your peripheral placement, focus on adjusting your keyboard tray’s height and position so that your forearms are parallel to the floor with elbows bent at roughly 90 degrees. Use the tray’s adjustable features, like height adjustments and tilt, to fine-tune your setup. Ensuring that your armrests are properly positioned can also support multi-directional movements, promoting healthy posture and reducing muscle fatigue. 1. Set the tray height so your forearms stay parallel and your wrists remain in a neutral posture. 2. Use the tray tilt feature to create a slight negative tilt (0° to -10°), reducing wrist extension and strain. 3. Position the mouse tray at the same height and close to the keyboard, supporting symmetrical arm support and preventing shoulder discomfort. Adjust these features whenever switching between sitting and standing to maintain proper ergonomic alignment and avoid fatigue.
Position the Tray to Keep Your Forearms Parallel to the Floor
Positioning your keyboard tray so that your forearms stay parallel to the floor is essential for reducing strain during long typing sessions. To achieve this, set your keyboard tray at or just below your elbow height, allowing your elbows to form a 90-degree bend with forearms extended straight forward. This keeps your wrists neutral, preventing excessive extension or flexion that can cause discomfort. Using an ergonomic mouse pad with wrist support can further enhance wrist alignment and comfort during extended work periods. Regularly check and adjust the tray position as needed when switching between sitting and standing positions. Maintaining this alignment promotes a relaxed posture, minimizes strain on your wrists and shoulders, and supports ergonomic comfort during extended periods of typing.
Pair Your Keyboard Tray With Proper Mouse Placement for Symmetry
Pairing your keyboard tray with proper mouse placement helps create a balanced and comfortable workspace.
To achieve this, focus on these key points:
- Keep the mouse tray at the same height as your keyboard tray to guarantee symmetrical arm and wrist alignment, reducing strain on your shoulders and neck.
- Position the mouse within 10–20 cm of the keyboard to prevent overreaching and keep your shoulders relaxed.
- Center the mouse and keyboard trays relative to your primary monitor to avoid twisting your torso and promote even workload distribution.
Using an adjustable mouse tray or integrated lateral platform helps maintain these positions.
Pairing the pointing device with your keyboard trays promotes natural hand positioning while improving comfort and reducing repetitive strain.
Re-Adjust Your Setup When Changing Between Sitting and Standing
When switching between sitting and standing, make sure to readjust your keyboard tray height so it stays at or just below your elbows, maintaining neutral wrist and forearm positions.
Fine-tune the tilt and reposition your mouse to keep your shoulders relaxed and your workspace comfortable. Regularly reassessing and tiny tweaks help you stay ergonomic throughout the day.
Adjust Riser Height Properly
As you switch between sitting and standing, it’s essential to re-adjust your keyboard riser height to maintain proper ergonomics.
Make certain the keyboard sits at or just below your elbow height, keeping your forearms parallel to the floor. To do this:
- Measure your natural elbow height when standing or sitting.
- Adjust the riser height so the keyboard maintains a slight negative tilt (-5° to -10°), preventing wrist extension.
- Keep the mouse at the same height as your keyboard to avoid shoulder strain and keep your setup balanced.
Regularly re-measure and fine-tune your riser height throughout the day to prevent strain.
Proper adjustment guarantees a neutral wrist position and comfortable posture, regardless of your position.
Reassess Elbow and Wrist Alignment
Switching between sitting and standing requires you to regularly reassess your elbow and wrist positions to keep your setup ergonomically sound. Adjust your keyboard tray height so your elbows stay bent at about 90 degrees, which helps maintain neutral wrist alignment.
When changing positions, fine-tune the keyboard tilt to keep your wrists straight and avoid upward or downward bending that can cause strain. Position the keyboard at or just below your elbow height to prevent wrist extension or flexion during long typing sessions.
Reassessing your wrist and elbow angles frequently helps adapt to body changes throughout the day and prevents cumulative stress injuries. Finally, make certain your mouse tray remains aligned with the keyboard tray for symmetrical support and to reduce shoulder tension.
Avoid Common Mistakes Like Over-Tilting or Overreaching
Avoiding common mistakes like over-tilting or overreaching is essential for maintaining proper ergonomic posture at your keyboard tray.
First, avoid positive tilt, which raises the front edge and forces wrist extension, increasing strain risk. Instead, aim for a slight negative tilt between 0° to -10°.
Avoid positive tilt; opt for a slight negative tilt (0° to -10°) to reduce wrist extension and strain.
Second, position your keyboard tray so your forearms are parallel to the floor with elbows at about 90 degrees; this prevents shoulder tension and overreaching.
Third, keep your mouse close and aligned with the keyboard tray to avoid reaching, which can cause neck, shoulder, and arm discomfort.
Use a height-adjustable tray to keep your keyboard at or just below elbow height, ensuring a neutral wrist posture. Regularly reassess and adjust your setup throughout the day for peak comfort and health.
Frequently Asked Questions
How to Properly Use a Keyboard Tray?
You should adjust your keyboard tray so your forearms are parallel to the floor, elbows at 90 degrees, and tilt it slightly. Keep it centered with your monitor, and place your mouse nearby for comfortable, strain-free use.
How Should My Keyboard Be Positioned?
You should position your keyboard at or just below elbow height, keeping it flat or slightly tilted, centered with your monitor, and close enough so your elbows stay at 90 degrees, helping you maintain a neutral wrist posture and avoid strain.
Will an Ergonomic Keyboard Help With Arthritis?
Yes, an ergonomic keyboard can help with arthritis by reducing joint strain, promoting a neutral wrist position, and minimizing painful bending. Its softer keys and adjustable features support comfort and reduce stress on affected joints.
Is It Better to Tilt or Flat Keyboard?
You should keep your keyboard flat or with a slight negative tilt. This position maintains neutral wrist posture, reduces strain, and promotes comfort, helping prevent injury while typing for extended periods.