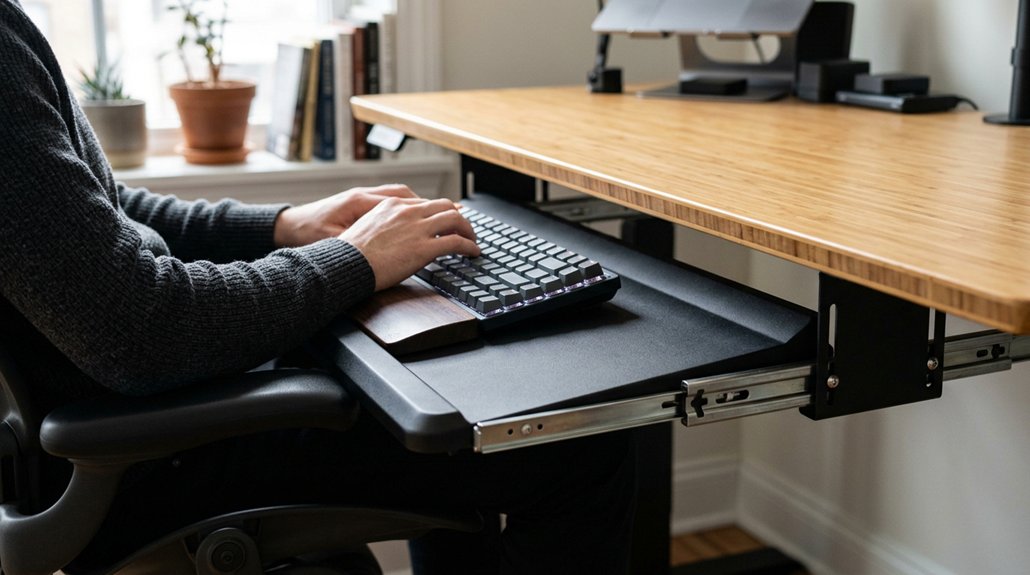
To position your keyboard tray correctly, set its height so your elbows are bent at about 90 degrees with your forearms parallel to the floor. Keep the keyboard slightly below elbow height to maintain a neutral wrist position, ideally with a negative tilt of -5° to -10°. Guarantee the tray is centered and your mouse is close by, level with the keyboard. Proper placement prevents strain and improves comfort; continue to explore how to optimize your workspace further.
Evaluate Your Workspace and Ergonomic Needs
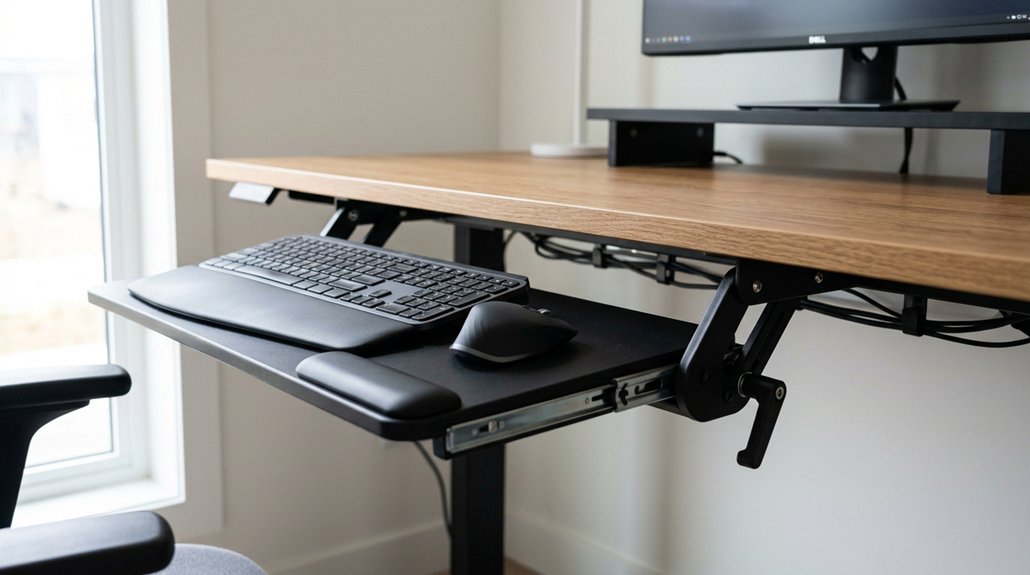
Before positioning your keyboard tray, it’s essential to assess your workspace and ergonomic needs. Check your chair height so your feet rest flat on the floor and your thighs are parallel, creating a stable foundation for proper posture.
Measure your natural elbow height with relaxed arms bent at 90–100 degrees to determine the ideal tray height. Evaluate your desk space and keyboard size to verify the keyboard tray can hold your keyboard and mouse comfortably, preventing extended reaches or cramped positioning.
Consider your monitor placement and viewing angle to align the keyboard tray centrally when using dual monitors. Finally, identify any discomforts like wrist, shoulder, or neck strain—these signals help you fine-tune the tray’s height, tilt, and distance to promote an ergonomic posture and maintain a neutral wrist posture during use. Additionally, ensure that the tray’s mounting compatibility is suitable for your desk thickness and edge shape to avoid slippage or installation issues.
Measure and Mark Your Ideal Keyboard Tray Height and Depth
To set your keyboard tray height and depth accurately, start by sitting in your typical work posture and identifying your natural elbow height. This is your target height for the tray so your arms stay in neutral postures. Mark the position where the keys align with or are just below your elbow height to keep your wrists straight while typing. For the depth, guarantee your forearms rest naturally with elbows close to your body, about 10–20 cm from your torso, so you don’t reach or lean forward. Use a tape measure and visual guides to mark these points before installing. Proper keyboard positioning enhances ergonomic benefit and prevents wrist strain during long typing sessions.
Position Your Keyboard for a Neutral Wrist and Elbow Alignment

Position your keyboard so your elbows are bent at about 90 degrees and your forearms are parallel to the floor. Adjust the tray height to keep your wrists in a straight line with your forearms, avoiding bending or extending your wrists. Use a slight negative tilt of 0° to -10° to support a neutral wrist position and prevent strain. Additionally, choosing a stand with adjustable height range ensures you can tailor the setup to your specific ergonomic needs.
Keep Elbows at 90 Degrees
Guaranteeing your elbows are at a 90-degree angle while using your keyboard helps promote neutral wrist and elbow alignment, which can reduce strain and improve comfort. Proper positioning of your keyboard tray guarantees your elbows stay comfortably bent, with your forearms parallel to the floor. Additionally, choosing ergonomic keyboards with features like adjustable tilt legs or split designs can further enhance your ergonomic comfort and support healthier posture.
To achieve this:
- Adjust your keyboard height so your hands rest just below or at your elbows.
- Keep your shoulders relaxed and close to your body by setting the tray height correctly.
- Recheck your elbow angle when switching between sitting and standing positions to maintain consistency.
Focusing on a correct elbow angle guarantees you’re supporting a neutral wrist posture and preventing unnecessary tension. Proper placement of keyboard trays plays a crucial role in aligning your elbows and wrists for ergonomic comfort.
Maintain Slight Wrist Angle
Are you aware that maintaining a slight wrist angle can considerably reduce strain during keyboard use? When adjusting your keyboard tray, aim for a neutral wrist position, keeping your wrists in a straight line with your forearms.
Use a slight negative tilt of about -5° to -10°, as recommended by CCOHS, to prevent wrist extension and lessen strain. Guarantee the tray height allows your elbows to be bent at roughly 90 degrees, keeping your forearms parallel or slightly angled downward toward the keyboard.
Center the keyboard directly in front of you to avoid twisting your shoulders or neck, which helps maintain neutral wrist and elbow alignment. Regularly check and re-adjust your keyboard tray, especially when switching between sitting and standing, to sustain a comfortable wrist angle and reduce fatigue.
Pay attention to adjustability ranges to ensure your setup supports your ergonomic needs effectively.
Set Keyboard at Forearm Level
When setting up your keyboard, it’s important that the height aligns with the underside of your elbows when your arms are relaxed and bent at roughly 90 to 100 degrees. This guarantees your keyboard tray is at forearm level, promoting a neutral position. Maintaining forearms stay parallel to the floor helps sustain proper wrist and elbow alignment, reducing strain. To achieve this:
- Adjust the keyboard trays so your wrists stay straight, avoiding upward or downward bending.
- Keep your elbows close to your body, not reaching forward or outward.
- Periodically recheck the height when switching between sitting and standing positions to keep your forearms in the ideal neutral position.
- Using a split ergonomic keyboard with adjustable tilt and tenting options further enhances wrist angle comfort and supports proper posture.
Adjust the Tray Tilt to Support Natural Hand and Wrist Posture
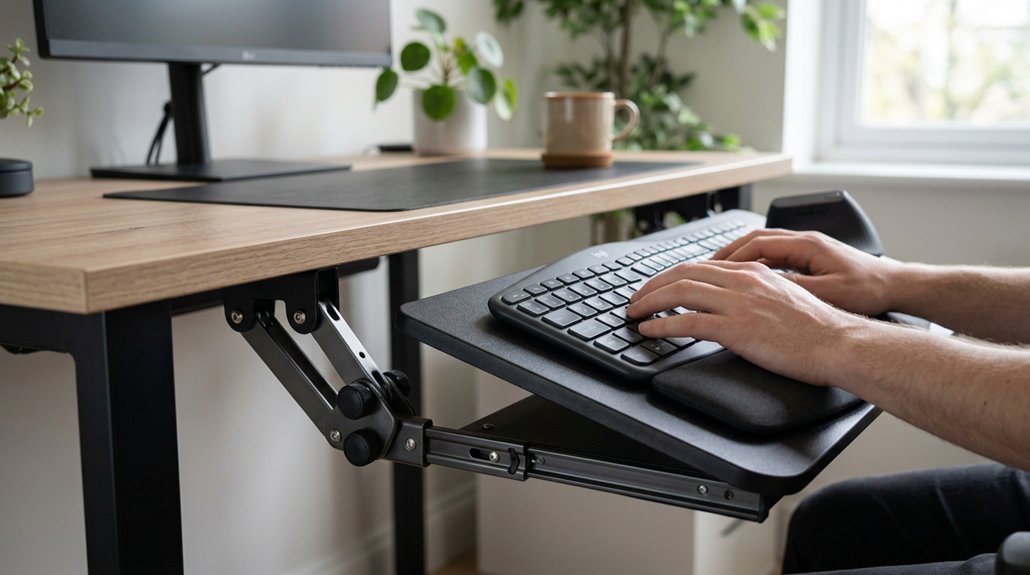
Adjust your keyboard tray to a slight negative tilt, around -5°, to keep your wrists in a natural, neutral position. This setting helps prevent wrist extension and reduces strain, lowering the risk of repetitive injuries. A contoured or tilted rest can further enhance ergonomic support and promote proper hand alignment. Remember to reassess the tilt regularly, especially when switching between sitting and standing.
Negative Tilt Benefits
Did you know that setting your keyboard tray to a negative tilt between 0° and -10° can greatly improve wrist comfort? This adjustment helps keep your wrists in a neutral, slightly downward position, reducing wrist extension and strain during typing. Using ergonomic pen grips with triangular or tripod shapes can further support natural hand posture and reduce fatigue during extended writing or typing sessions. Negative tilt aligns the keyboard with the natural downward slope of relaxed forearms, preventing upward wrist bending that leads to discomfort and injury. Proper adjustment can also decrease the risk of repetitive strain injuries, such as carpal tunnel syndrome. When selecting the right tilt:
- Use a negative tilt around -5° to -10°, as recommended by the CCOHS
- Allow 1–2 weeks for your body to adapt comfortably
- Focus on maintaining a relaxed, natural wrist position during long periods of typing
This setup promotes ergonomic health and helps prevent unnecessary wrist stress.
Prevents Wrist Extension
Ensuring the keyboard tray is tilted slightly to a negative angle—between 0° and -10°—helps keep your wrists in a natural, neutral position while typing. This slight tilt supports proper wrist and arm alignment, reducing strain and repetitive stress injuries. Avoid positive tilt, which bends your wrists upward and raises risk factors like carpal tunnel syndrome and tendon strain. Ergonomic guidelines suggest a tilt around -5° to -10° to effectively prevent wrist extension. Keep in mind, adjusting the tilt regularly when switching between sitting and standing will maintain ideal wrist posture. Use this table to better understand proper keyboard tilt and wrist support:
| Keyboard Tray Tilt | Effect on Wrist | Recommended Range |
|---|---|---|
| Negative | Neutral wrist | -5° to -10° |
| Zero | Slight extension | 0° |
| Positive | Wrist extension | +5° |
Place Your Mouse and Input Devices for Comfort and Efficiency
Placing your mouse and input devices correctly can greatly improve comfort and efficiency while working. To optimize your setup, confirm your mouse tray is level with the keyboard to maintain neutral wrist alignment and prevent shoulder strain.
Keep the mouse close to the keyboard, ideally 10–20 cm away, to avoid awkward reaching and reduce neck and shoulder tension. Use an integrated or adjustable mouse platform that slides with the keyboard tray for consistent hand positioning.
For centralized input setups, place both the keyboard and mouse on the same surface plane to support balanced arm posture. Additionally, ensure cables have 10–15 cm of slack to allow smooth movement and prevent tray misalignment during changes.
Proper positioning of your input devices enhances comfort and promotes a healthier workspace.
Check Monitor Placement and Ensure Workstation Flexibility
Proper monitor placement complements a well-positioned keyboard tray by reducing strain and promoting comfort. Position your monitor screen directly in front of you, centered with the keyboard tray, to prevent twisting your shoulders or neck. Keep the top line of the monitor slightly below eye level to support a neutral head and neck posture.
Use adjustable monitor arms or stands to easily change screen height and distance, adding ergonomic flexibility to your workstation setup. Guarantee your workspace allows seamless shifts between sitting and standing positions without misaligning the monitor and keyboard tray.
For dual monitors, align them symmetrically with the keyboard tray centered between them, balancing workload and reducing uneven shoulder strain. Proper placement helps you work efficiently while maintaining good posture.
Test Your Setup With Different Tasks and Fine-Tune for Comfort
To guarantee your keyboard tray setup works comfortably for all tasks, it’s essential to test it during actual work activities. Use different typing and mouse motions to identify discomfort or awkward postures.
Focus on maintaining wrist position and shoulder relaxation, adjusting the tray height or tilt to keep a neutral alignment. Fine-tune the keyboard tray angle within a -5° to -10° tilt range to prevent wrist extension during extended use.
Make certain the mouse stays close and level with the keyboard tray during rapid pointing tasks to minimize reaching and shoulder strain.
Regularly reassess and adjust your setup whenever switching tasks or changing positions, such as sitting or standing, to sustain ergonomic comfort and productivity. Remember, small adjustments make a significant impact on comfort and efficiency.
Recognize Signs of Poor Ergonomics and Make Long-Term Adjustments
If you notice persistent wrist pain, numbness, or tingling after typing, it’s a clear sign your keyboard trays may be misaligned and causing strain. An improper ergonomic setup often leads to shoulder tension and hunching forward, indicating the tray height is too low or far.
Excessive reaching for the mouse or leaning forward signals poor placement, increasing musculoskeletal stress. Discomfort or awkward wrist angles when changing between sitting and standing show your tray might need height or tilt adjustments.
To promote a neutral wrist, focus on maintaining proper alignment over time. Regularly reassess your posture and make incremental changes to your keyboard tray setup. These adjustments help guarantee your wrists stay straight, elbows stay close to your body, and you avoid long-term discomfort.
Frequently Asked Questions
How to Properly Use a Keyboard Tray?
To properly use your keyboard tray, adjust it to elbow height with a slight negative tilt, keep everything centered and close, and guarantee your feet are flat for a comfortable, neutral typing posture that reduces strain and promotes good ergonomics.
How Should My Keyboard Be Positioned?
You should position your keyboard so it’s centered with your monitor, kept at or just below elbow level, with a slight negative tilt. Keep your wrists straight, elbows relaxed, and forearms resting naturally for comfortable, strain-free typing.
Will an Ergonomic Keyboard Help With Arthritis?
Yes, an ergonomic keyboard can help with arthritis by promoting neutral wrist position, reducing strain, and decreasing joint pressure. Combined with proper tray positioning and regular breaks, it can alleviate pain and stiffness during extended typing.
Is It Better to Tilt or Flat Keyboard?
You should prefer a flat keyboard or a slight negative tilt of 5° to 10°, as it keeps your wrists neutral, reduces strain, and lowers the risk of discomfort and injury. Avoid positive tilt or raised feet.