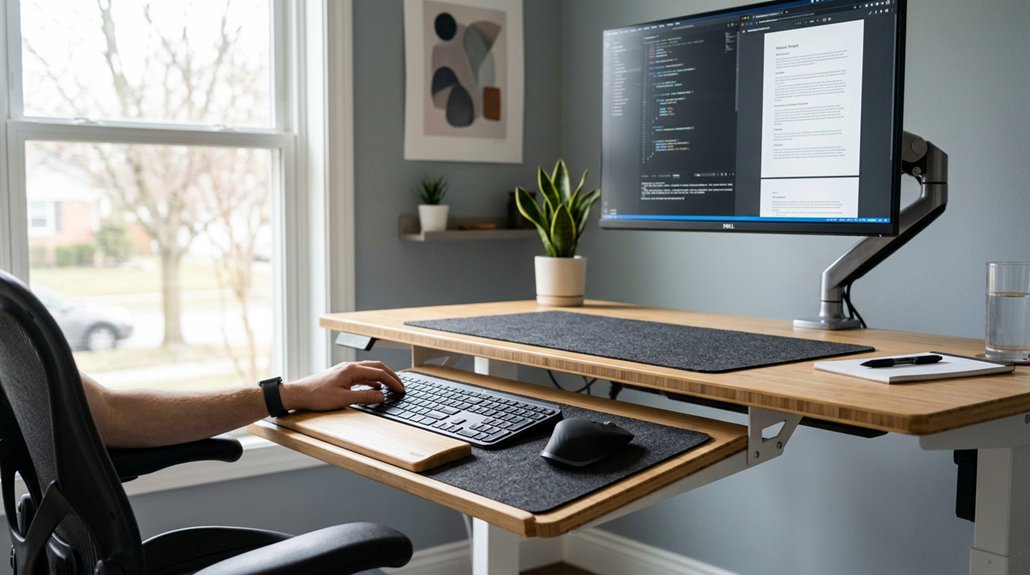
To relieve wrist pain, position your keyboard tray so it’s at or just below elbow height, keeping your forearms parallel to the floor and elbows at a 90-degree angle. Use a slight negative tilt of about -5° to -10° to maintain a neutral wrist position and reduce strain. Make sure your mouse is close and level with the keyboard. Proper setup can prevent discomfort, and you’ll find more tips if you explore further.
Why Proper Keyboard Tray Positioning Matters for Wrist Comfort

Proper keyboard tray positioning is essential because it directly impacts your wrist comfort and helps prevent injuries. When your keyboard tray is set at or just below elbow height, your forearms stay parallel to the floor, reducing wrist extension and strain.
A slight negative tilt of about -5° to -10° encourages a neutral wrist position, lowering the risk of repetitive strain injuries like carpal tunnel syndrome. Keep your mouse within close reach and at the same height to avoid awkward reaching and shoulder elevation.
Proper ergonomic setup, including correct forearm alignment, minimizes wrist pain and nerve irritation. Avoid excessive positive tilt or high positioning, which can increase wrist extension by up to 77%. Thoughtful placement supports ergonomic adjustments and natural wrist posture, enhancing overall comfort during extended computer use.
How to Adjust Your Keyboard Tray for Sitting and Standing
Adjusting your keyboard tray for both sitting and standing positions involves fine-tuning the height and tilt to maintain ergonomic alignment. Set the tray height so the keyboard is at or slightly below your elbow level, keeping your forearms parallel to the floor and wrists in a neutral position. Use a negative keyboard tilt, between 0° and -10°, to reduce wrist extension and strain, following ergonomic guidelines. When switching between sitting and standing, independently adjust the tray height and tilt to sustain proper alignment and prevent wrist pain. Placing your mouse at the same height and close to the keyboard helps minimize reaching and shoulder strain. Regularly recheck and fine-tune your setup, as small adjustments can greatly relieve wrist discomfort during prolonged typing sessions. Proper tilt adjustment ensures pressure is evenly distributed and encourages a healthy, neutral wrist posture.
Best Tilt Angles to Minimize Wrist Strain
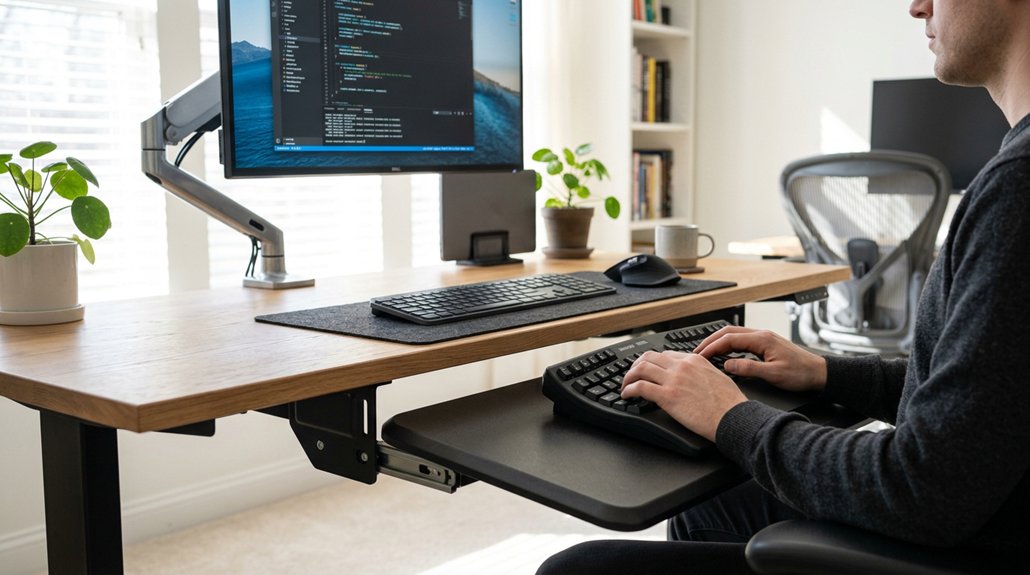
To minimize wrist strain, you should set your keyboard tray to a slight negative tilt, around -5° to -10°, which keeps your wrists in a neutral position. Positive tilt angles tend to increase wrist extension and can lead to discomfort or injury. Regularly adjusting your tilt and maintaining proper wrist posture helps reduce strain and fatigue. Incorporating an ergonomic adjustable height range allows for more precise positioning and better overall comfort during extended use.
Optimal Negative Tilt Angles
Choosing the right negative tilt angle for your keyboard tray is essential for minimizing wrist strain, and research shows that angles between -5° and -10° are most effective.
An ergonomic setup with this slight negative tilt keeps your wrist in a neutral position during typing, reducing wrist extension and pressure on the carpal tunnel. Avoid positive tilt, which can cause your wrists to bend upward and increase strain.
Setting your keyboard tray to a negative tilt helps prevent forearm discomfort and supports a more natural typing posture. Although you may need one to two weeks to adapt, this adjustment can markedly decrease wrist pain over time.
Ensuring the proper negative tilt angle aligns with ergonomic guidelines, enhancing comfort and reducing the risk of repetitive strain injuries. Proper wrist support design can further optimize your setup for comfort and health.
Importance of Neutral Wrist Posture
Maintaining a neutral wrist posture while typing is key to reducing strain and preventing injury. Your keyboard tray should be positioned at or just below elbow height, ensuring your forearms are parallel to the ground. This setup supports a neutral wrist posture, where your wrists stay straight without bending up, down, or sideways, minimizing tendon and nerve stress.
A slight negative tilt angle of 0° to -10° helps keep your wrists straight, reducing wrist extension and lowering wrist pain and the risk of repetitive strain injuries. Avoid excessive positive tilt angles, which can increase wrist extension by up to 77%.
Regularly adjusting your keyboard tray tilt and height, especially when switching between sitting and standing, is crucial to maintaining ideal wrist alignment and reducing strain.
Signs Your Keyboard Tray Setup Is Ergonomic
How can you tell if your keyboard tray setup is truly ergonomic? If you experience no wrist pain or stiffness after long typing sessions, you’re likely on the right track. Your shoulders should feel relaxed, not elevated or tense. Your forearms should be parallel, with the keyboard tray at or just below elbow height. The wrist should maintain a neutral position, with no strain or extension. The slight negative tilt (-5° to -10°) prevents wrist extension. Additionally, mouse placement should be close and level, within 10–20 cm. Ensuring the use of supportive wrist rests can help sustain proper wrist support during extended use.
How to Keep Your Wrists Aligned While Working

To keep your wrists aligned while working, start by maintaining a neutral position with your forearms parallel to the floor and elbows at a 90-degree angle. Adjust your keyboard tilt slightly negative so the front is higher than the back, preventing wrist extension. Keep your mouse at the same height and close to your keyboard to avoid unnecessary strain while clicking or pointing. Using a properly designed wrist rest can further support your wrist positioning and reduce fatigue during long typing sessions.
Maintain Neutral Wrist Position
Keeping your wrists in a neutral position while working is essential to prevent strain and discomfort. To do this, focus on these key points:
- Position the keyboard tray at or just below elbow height so your forearms are parallel to the floor, promoting a neutral wrist position.
- Use a slight negative tilt (0° to -10°) on the keyboard tray to prevent wrist extension and reduce strain.
- Keep wrists in line with your forearms by avoiding positive tilt, which can cause up to 77% more strain.
- Make certain the mouse and keyboard are level and within easy reach, maintaining forearm alignment to minimize awkward bending.
Regular adjustments to keyboard height and tilt help sustain this position and reduce wrist fatigue.
Adjust Keyboard Tilt Properly
Achieving proper wrist alignment while working requires adjusting your keyboard tray tilt to a slight negative angle, typically between 0° and -10°. This tilt option helps keep your wrist position neutral, reducing wrist extension and minimizing strain. Using a wrist rest can further support your wrists and enhance comfort during long typing sessions. Avoid positive tilt angles, which increase wrist extension by up to 77%, heightening the risk of repetitive strain injury (RSI). Guarantee your keyboard height allows your forearms to stay parallel to the ground, promoting proper alignment. Adjusting the tilt based on whether you’re sitting or standing keeps wrists aligned and prevents discomfort. An ergonomic workstation benefits from correct keyboard tilt, supporting a neutral wrist posture during long typing sessions. Properly setting your keyboard tilt is key to reducing wrist pain and maintaining comfort throughout the workday.
Keep Mouse Close and Low
Guaranteeing your mouse stays close and at the right height is key to keeping your wrists aligned during work. Keeping the mouse within 10–20 cm (4–8 inches) of your keyboard minimizes shoulder reaching and wrist extension, reducing wrist pain. Using a wireless ergonomic keyboard or combo can further help maintain proper placement and reduce clutter, promoting a more ergonomic workstation. Use a mouse tray or lateral platform attached to your keyboard tray to maintain consistent mouse proximity and height. Keep these tips in mind:
- Position the mouse level with or slightly below keyboard height for neutral wrist alignment.
- Avoid placing the mouse on the desk when your keyboard is elevated — mismatched heights cause wrist deviation.
- Make certain mouse cables have enough slack for smooth movement without lifting or pulling.
- Keep the mouse close to your keyboard to prevent unnecessary shoulder and wrist strain.
This setup promotes an ergonomic workstation and helps prevent wrist pain.
Common Mistakes That Worsen Wrist Pain and How to Avoid Them
One of the most common mistakes that worsens wrist pain is incorrect keyboard tray positioning, which can cause wrist extension and strain during extended use. Setting the tray too high visually often leads to shoulder shrugging and wrist discomfort.
Use relaxed posture tests, like closing your eyes, to find natural elbow height, guaranteeing your keyboard height supports neutral wrists. Avoid excessive positive tilt, which can increase wrist extension by up to 77%, by aiming for a slight negative tilt between -5° and -10°.
Also, don’t forget to keep the mouse level and close to the keyboard, within 10–20 cm, to prevent shoulder strain. Re-adjust the tray height and tilt when switching between sitting and standing positions, and guarantee proper cable slack on standing desks to prevent misalignment and wrist discomfort.
Expert Tips to Fine-Tune Your Keyboard Tray Setup
To fine-tune your keyboard tray setup, start by adjusting the height so your forearms are parallel to the floor with elbows bent at roughly 90 degrees. This position supports neutral wrist posture, reducing strain.
Adjust your keyboard height so forearms are parallel to the floor with elbows at 90° for optimal wrist health.
- Use a slight negative tilt angle (-5° to -10°) to prevent wrist extension and maintain comfort.
- Keep the mouse on the same tray level and close to the keyboard to avoid reaching, shoulder strain, and guarantee proper hand alignment.
- Avoid positive tilt angles that increase wrist extension, which can worsen pain, and opt for a flat or downward slope.
- Recheck and adjust the tray when switching between sitting and standing, maintaining ergonomic elbow height and wrist comfort all day.
Fine-tuning guarantees peak ergonomic health and minimizes wrist pain.
How to Integrate Your Keyboard Tray With Other Ergonomic Tools
Integrating your keyboard tray with other ergonomic tools creates a cohesive setup that enhances comfort and reduces strain.
Position your keyboard tray at or just below elbow height with a slight negative tilt (-5° to -10°) to keep your wrists in a neutral position. Use wrist rests aligned with the tray height to cushion your palms during pauses without pressing on the carpal tunnel.
Pair your setup with an ergonomic mouse or rollerbar placed centrally to avoid shoulder and wrist height mismatch, supporting relaxed arms. Consider a split or tented ergonomic keyboard to maintain natural forearm positioning.
When switching between sitting and standing, adjust the tray height and tilt regularly to sustain ergonomic benefits and prevent wrist pain from recurring. Staying consistent with these tools helps promote proper wrist and arm alignment.
When Should You Upgrade Your Keyboard Tray for Better Comfort
Ever notice persistent discomfort or tension in your wrists and shoulders after typing? If so, it’s time to evaluate upgrading your keyboard tray. Ask yourself:
If typing causes wrist or shoulder pain, consider upgrading to an ergonomic, adjustable keyboard tray.
- Does your current tray cause wrist pain or shoulder tension?
- Is your wrist extended or bent due to poor positioning?
- Can your tray adjust independently for height and negative tilt?
- Does it support proper mouse placement to maintain wrist and arm alignment?
If you answered “yes” to any, it’s time for an ergonomic upgrade. An adjustable keyboard tray with negative tilt helps maintain neutral wrist posture, reducing RSI risk.
For standing desks, guarantee your tray supports independent height adjustment. Replacing your tray improves comfort, decreases tension, and promotes better overall ergonomic equipment use.
Frequently Asked Questions
How to Stop Wrist Pain When Using a Keyboard?
You can stop wrist pain by adjusting your keyboard tray so it’s at elbow height with a slight negative tilt, keeping your wrists straight and floating, and ensuring your mouse stays close and level to prevent strain.
What Is the Best Wrist Position for Keyboard?
You should keep your wrists straight and in a neutral position, with forearms parallel to the floor, keyboard slightly tilted downward, and wrists floating, not resting, to effectively reduce strain and prevent wrist pain during keyboard use.
Do Keyboard Wrist Rests Actually Help?
Keyboard wrist rests can help by providing cushioning during breaks, but they don’t directly relieve wrist pain if your setup isn’t ergonomic. Use them properly, and prioritize adjusting your keyboard and desk height first for best relief.
Is a Keyboard Tray Better Ergonomically?
Yes, a keyboard tray is more ergonomic because it keeps your wrists neutral, reduces strain, and prevents hunching. Adjust it properly at or just below elbow height with a slight negative tilt to maximize comfort and minimize pain.