
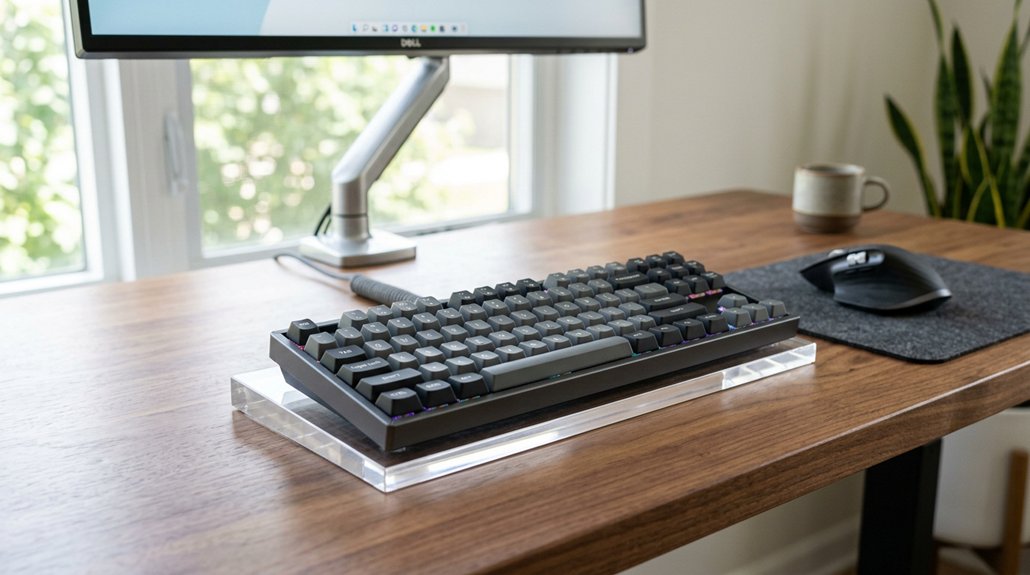
To find your ideal keyboard height, position it so your elbows are bent at about 90–100°, with your wrists flat and just below elbow level. Use an adjustable tray with a slight negative tilt (0° to -10°) to keep your wrists neutral and reduce strain. Make certain your mouse is close and level with the keyboard to avoid shoulder stress. Proper setup prevents discomfort and injury—keep exploring for detailed tips to optimize your workspace further.
Why Poor Keyboard Height Can Cause Pain: and How to Fix It

Poor keyboard height can cause pain because it forces your wrists and shoulders into unnatural positions, leading to muscle tension and strain. When your keyboard is too high or low, you can’t keep your wrists neutral, increasing pressure on the median nerve in your carpal tunnel and raising the risk of carpal tunnel syndrome. An incorrect keyboard height also causes you to shrug your shoulders or slouch, which contributes to neck and upper back pain over time. Additionally, choosing a stand with adjustable height options ensures you can tailor your setup to your specific needs, promoting better ergonomics. To fix this, aim for a keyboard height that aligns with your elbow height, allowing your forearms to stay parallel to the floor. An adjustable keyboard tray with a slight negative tilt helps maintain proper ergonomic setup and reduces repetitive strain, protecting your musculoskeletal health.
How to Find Your Ideal Elbow Height for Keyboard Placement
How can you determine the ideal elbow height for your keyboard setup? Start by sitting comfortably with your back supported, feet flat, and arms relaxed at a 90 to 100-degree bend. Measure your floor-to-elbow height using a ruler or tape, keeping your forearms parallel to the floor. The goal is to position your keyboard so the top of the keys is at or just below your elbows, promoting a neutral wrist position. Adjust your chair height, keyboard tray, or desk to achieve this. Remember, a slight negative tilt (0° to -10°) on your keyboard tray helps maintain alignment. Ensuring the keyboard tray is compatible with your desk and providing proper mounting support can significantly improve ergonomic comfort. Keep elbows close to your body to reduce strain. Use an ergonomic keyboard for better wrist support. Adjust chair height for proper arm positioning. Make sure keyboard tray allows a slight negative tilt. Maintain neutral wrist posture during typing.
How Do You Know If Your Keyboard Setup Is Causing Strain?
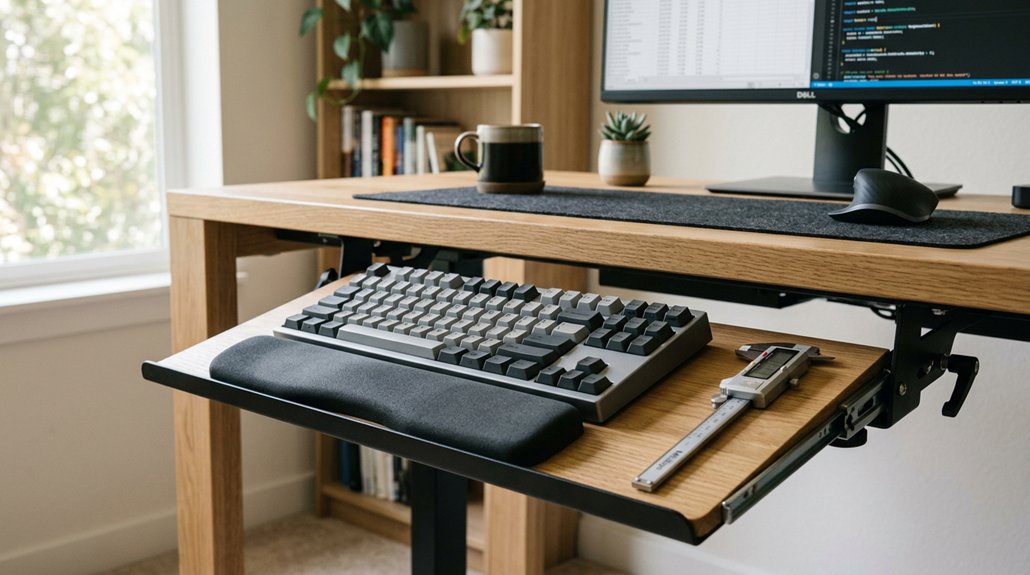
If you notice wrist pain, finger numbness, or tingling, your keyboard setup might be to blame.
Shoulder shrugging or raised elbows during typing can also signal improper height, while wrist bending suggests misalignment.
Pay attention to neck or back tension, as these can be indirect signs of a poorly positioned keyboard.
Additionally, an improper tilt or lack of adjustable features can contribute to ergonomic strain, affecting overall comfort and health.
Signs of Posture Strain
Feeling persistent pain or numbness in your wrists is a clear sign that your keyboard setup may be causing strain. When the keyboard height isn’t properly adjusted, it forces your wrists into harmful extension and alters your overall posture.
You might notice shoulder shrugging or raised elbows during typing, indicating your keyboard is too high and causing muscle tension in your neck and shoulders. Frequent neck pain or a forward head posture suggest compensatory strain due to misaligned positioning. Fatigue or discomfort in your forearms and upper arms signals unnatural arm angles beyond the recommended 90 degrees.
- Wrist pain or numbness, especially near the carpal tunnel
- Shoulder tension from elevated elbows
- Persistent neck discomfort or forward head posture
- Fatigue in forearms and upper arms
- Overall signs of poor ergonomic office setup
- Choosing an ergonomic wrist rest with proper contour design can help improve wrist positioning and reduce strain.
Common Ergonomic Mistakes
When your keyboard isn’t set up correctly, signs of ergonomic mistakes become obvious during your typing sessions. If you notice shoulder shrugging or hunching, your keyboard height might be too high, causing muscle tension.
Wrist extension or upward bending increases pressure on your median nerve, signaling improper wrist positioning or tilt. Persistent finger numbness, wrist pain, or tingling are clear early signs of strain from an incorrect setup, raising your risk of repetitive stress injuries.
Additionally, using ergonomic grips that promote a natural hand orientation can greatly improve comfort and reduce fatigue during extended typing or drawing sessions.
Difficulty maintaining elbows close to your body or achieving a 90-degree bend indicates poor keyboard placement relative to your natural arm height. Additionally, frequent leaning forward or neck strain suggests your workspace isn’t ergonomic.
Adjusting your keyboard height and positioning to promote a neutral posture can help prevent these common mistakes and reduce discomfort.
How to Adjust Your Keyboard Tray for the Perfect Fit
Start by setting your keyboard tray height so your elbows form a 90-100 degree angle with forearms parallel to the floor. Then, adjust the tilt to a slight downward angle between 0° and -10° to keep your wrists flat and comfortable. Incorporate an ergonomic split design with adjustable tilt options and cushioned wrist rests to further enhance wrist neutrality and reduce strain. Finally, position your mouse close to the keyboard on a lateral platform, about 10–20 cm away, to reduce reaching and keep your shoulders relaxed.
Proper Tray Height Adjustment
Adjusting your keyboard tray height is essential for maintaining a comfortable and ergonomic workspace. Guarantee your forearms and hands form a straight line with your elbows bent at roughly 90–100 degrees, aligning the keyboard keys with the underside of your elbows.
Use a slight negative tilt of 0° to -10° to keep wrists neutral and reduce strain, avoiding positive tilt that causes extension. Position the tray close enough so your shoulders stay relaxed, and keep the mouse within 10–20 cm of the keyboard for ergonomic accuracy.
Recheck and adjust when switching between sitting and standing to maintain proper alignment. Perform these adjustments with good posture—back supported, feet flat, elbows relaxed—to prevent visual misjudgments and maximize comfort. Additionally, choosing a keyboard with ergonomic design factors such as split layouts or supportive palm rests can further enhance comfort during prolonged use.
- Maintain proper elbow bend for peak support
- Use negative tilt to protect your wrists
- Keep the mouse within easy reach for efficiency
- Reassess tray height when changing postures
- Prioritize good posture during adjustments
Optimal Tray Tilt Settings
Positioning your keyboard tray at the right tilt can make a significant difference in maintaining comfortable and healthy wrist alignment. Setting your keyboard tray tilt between -5° and -10° helps keep your wrists in a neutral position, reducing strain over time.
Avoid positive keyboard tilt, which forces wrist extension and can increase the risk of carpal tunnel syndrome. Instead, fine-tune the tilt so your forearms and hands form a straight line while typing, ensuring your wrists stay flat and aligned with your forearms. Proper tray tilt not only prevents wrist hyperextension but also promotes better forearm alignment.
During frequent position changes, such as sitting or standing, reassess and adjust the tilt to sustain ergonomic wrist support, supporting a healthier and more comfortable ergonomic desk setup. Additionally, choosing a contoured or tilted wrist rest can further enhance ergonomic comfort and prevent repetitive strain.
Correct Mouse and Wrist Position
To achieve the most comfortable and ergonomic mouse and wrist setup, you need to guarantee your keyboard tray is properly adjusted. Begin by setting the height so your forearms and hands form a straight, neutral line, minimizing wrist flexion or extension.
Use a slight negative tilt of 0° to -10° on your keyboard tray to keep wrists flat and reduce carpal tunnel pressure. Position your mouse level with the keyboard and within 10–20 cm to prevent reaching and shoulder strain. If available, use a lateral mouse platform for better alignment.
Always make certain your wrists stay flat and hands aren’t bent upward or downward during use. Regularly recheck the alignment when switching between sitting and standing to maintain an ergonomic, neutral wrist and mouse position.
- Keep the keyboard at elbow height for natural wrist alignment
- Use a slight negative tilt to keep wrists flat
- Place the mouse close to avoid reaching forward
- Make certain wrists stay in a neutral, flat position
- Reassess tray and mouse placement regularly
- Consider adjustable features like multi-dimensional adjustments for optimal ergonomic setup.
Why Use a Negative Keyboard Tilt? Here’s What You Need to Know
Have you ever wondered why a negative keyboard tilt can make a noticeable difference in your comfort? A negative keyboard tilt, from 0° to -10°, helps prevent wrist extension, keeping your wrists in a neutral position while typing. This alignment reduces muscle tension and lowers your risk of musculoskeletal strain and carpal tunnel syndrome. Choosing ergonomic supports with non-slip base stability can enhance your setup by ensuring your keyboard remains securely in place during use.
According to CCOHS recommendations, a slight negative tilt (-5° to -10°) maintains straight wrists in line with your forearms, promoting better ergonomics. Using a keyboard tray with negative tilt encourages a natural wrist posture, lessening pressure on the median nerve. Keep in mind, you may need 1–2 weeks to adapt to this setup, but the long-term ergonomic benefits make it worth the adjustment.
How to Position Your Mouse for Ergonomic Comfort
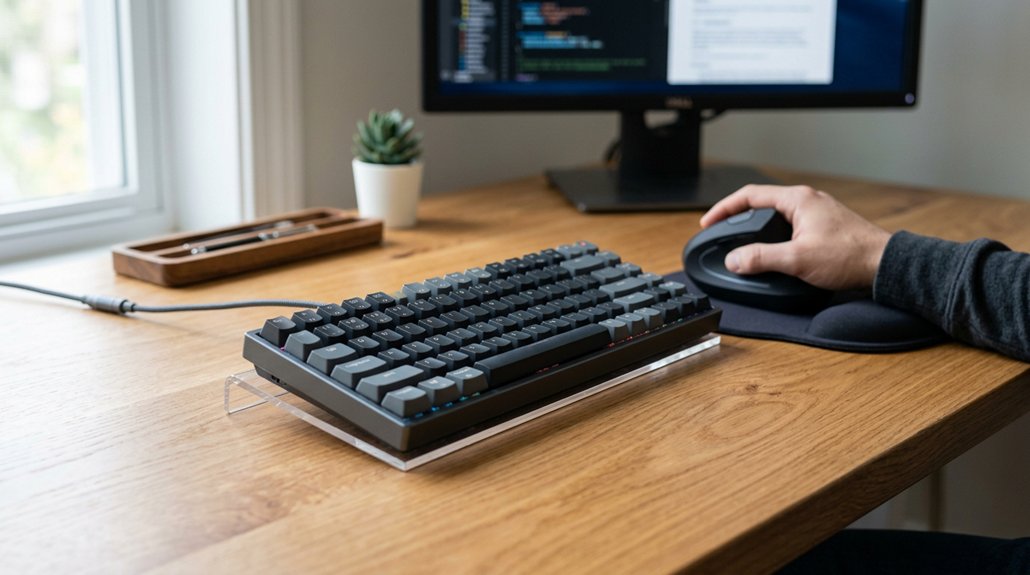
Ever wondered how to set up your mouse for maximum comfort during long hours at your desk? The key is proper mouse placement to guarantee ergonomic comfort.
Keep the mouse close to your keyboard—within 10–20 cm—to avoid reaching, which can increase shoulder tension. Position it level with your keyboard to promote neutral wrist and forearm alignment, reducing strain. Use a lateral mouse platform if available, for better alignment with your keyboard.
Rest your arm comfortably at your side, allowing your shoulder to relax, and avoid hunching or shrugging. Maintain about 10–15 cm of cable slack on adjustable desks to prevent movement restriction during height changes.
Proper mouse placement is essential for comfort and reducing fatigue during extended work sessions.
Common Keyboard Setup Mistakes and How to Fix Them
Many people make common mistakes when setting up their keyboard that can lead to discomfort or injury.
Using an incorrect tray height, poor wrist positioning, or placing the mouse too far away can all cause strain.
Fixing these issues starts with proper measurement and awareness of your posture, so your setup supports ergonomic health.
Incorrect Tray Height
Setting your keyboard tray at the wrong height can cause persistent muscle tension and increase your risk of strain or injury. An incorrect tray height often leads to shoulder shrugging and wrist extension, disrupting your neutral posture.
When the tray is too high, you’re forced to lift your elbows and shoulders, causing unnecessary fatigue, and raising your risk for conditions like carpal tunnel syndrome. Conversely, too low, and you’ll hunch forward, straining your back and neck.
To fix this, measure your natural elbow height with arms relaxed at 90–100 degrees. Adjust the keyboard keys to align with the underside of your elbows and set the tilt to a slight negative angle (-5° to -10°). Proper setup guarantees peak respect for your elbow, wrist position, and overall comfort.
- Incorrect tray height causes muscle tension and improper alignment
- High trays elevate shoulders, disrupting neutral posture
- Low trays promote hunching and poor back curve
- Proper adjustment aligns keyboard with your elbows
- Tilt adjustments prevent wrist extension and strain
Poor Wrist Positioning
Poor wrist positioning often results from incorrect keyboard setup, particularly when the height and tilt aren’t adjusted properly.
If your keyboard height is too high, your wrists remain bent upwards, increasing wrist extension and putting pressure on the median nerve in the carpal tunnel, raising the risk of carpal tunnel syndrome. Conversely, a keyboard placed too low causes excessive wrist flexion, leading to discomfort in your fingers, wrists, and forearms.
A positive keyboard tilt (sloped toward you) worsens wrist extension, so avoid it; instead, aim for a neutral tilt of 0° to -10°, which helps keep your wrists aligned and relaxed.
Using relaxed elbow height measurement guarantees your hand and wrist stay in a neutral position, reducing strain and promoting ergonomic comfort.
Inadequate Mouse Placement
Proper keyboard positioning is only part of achieving ergonomic comfort; how you place your mouse is equally important. An improperly positioned mouse can cause shoulder strain, wrist discomfort, and poor posture.
To fix this, keep your mouse close to the keyboard, ideally 10–20 cm away, and at the same height to support neutral wrist alignment. Use a lateral mouse platform or tray extension to align the mouse with your forearm, reducing shoulder rotation. Avoid placing the mouse too far forward or to the side, which leads to shoulder shrugging and upper back tension.
If you have a sit-stand office setup, guarantee sufficient cable slack so the mouse doesn’t snag or move during height adjustments. Proper placement minimizes strain and promotes a more comfortable, efficient workspace.
Choosing the Best Ergonomic Keyboard for Your Work
Are you selecting an ergonomic keyboard that genuinely reduces strain? Focus on adjustable keyboard height and negative tilt (0° to -10°) to promote neutral wrist alignment and lessen muscle tension.
Choose ergonomic keyboards with adjustable height and negative tilt to support natural wrist posture and reduce strain.
Ergonomic keyboards with split or tented designs help keep your wrists and forearms in natural positions, minimizing the risk of carpal tunnel syndrome. Mechanical keyboards with low-profile keys can be placed on trays for better keyboard tilt and typing height adjustments.
Make certain the keyboard fits your workspace to avoid cramped positioning—your arms should be close to your body with elbows bent around 90°. Avoid positive tilt, which can cause harmful wrist extension.
Prioritizing flat or slightly sloped surfaces guarantees a comfortable, strain-free typing experience.
How Monitor Height and Placement Boost Your Keyboard Ergonomics
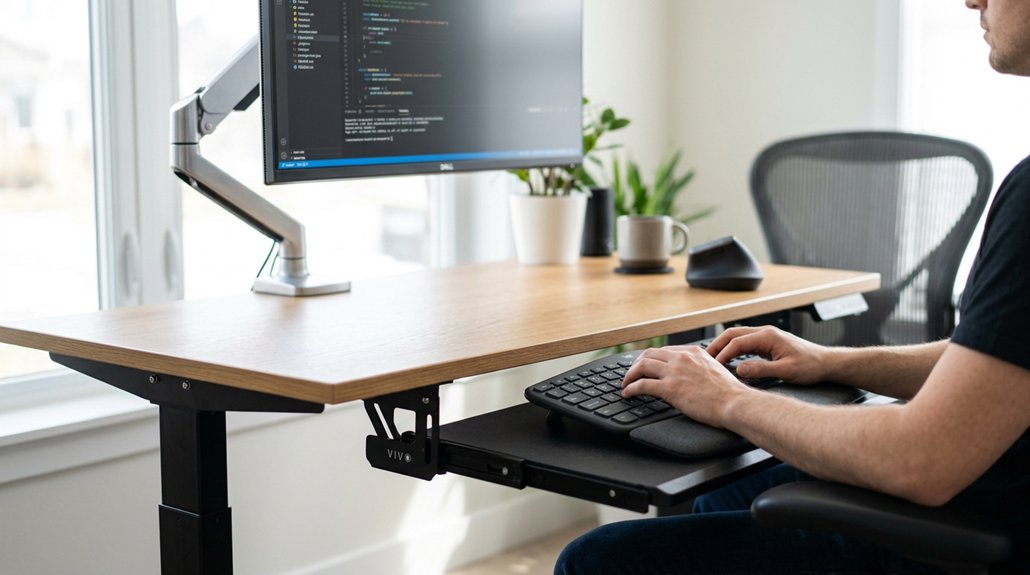
To maximize your keyboard’s ergonomic benefits, paying attention to monitor height and placement is essential. Position the top third of your monitor at or just below eye level; this encourages a neutral neck posture, reducing strain.
Keep your monitor about an arm’s length away to promote upright posture and prevent slouching. Use an adjustable monitor arm to fine-tune height and distance, ensuring the monitor aligns with your keyboard’s level just below your elbows.
Correct monitor placement minimizes eye and head movement, supporting better posture and reducing fatigue. Proper setup also prevents glare, helping you stay focused.
- Maintain monitor eye level to avoid neck strain
- Use a monitor arm for customized positioning
- Position monitor to minimize head rotation
- Keep monitor at an arm’s length distance
- Arrange placement to reduce glare and eye strain
Extra Tips: Maintaining Good Posture During Work
Maintaining good posture while working is key to preventing discomfort and long-term issues.
To maintain good posture, focus on your keyboard placement; keep wrists and hands flat and level, with your wrists slightly below your elbows. Adjust your office chair’s seat height so your feet rest flat on the floor, providing proper thigh support and knee angle. Your chair should have lumbar support to keep your back fully supported, preventing slouching. Keep your shoulders relaxed and elbows close to your sides, with forearms horizontal or slightly tilted downward.
Regularly take short breaks to stand, stretch, and move, which helps prevent neck strain and muscle fatigue. Proper posture helps sustain comfort during work and supports overall spinal health throughout your day.
Essential Ergonomic Products to Improve Your Keyboard Setup
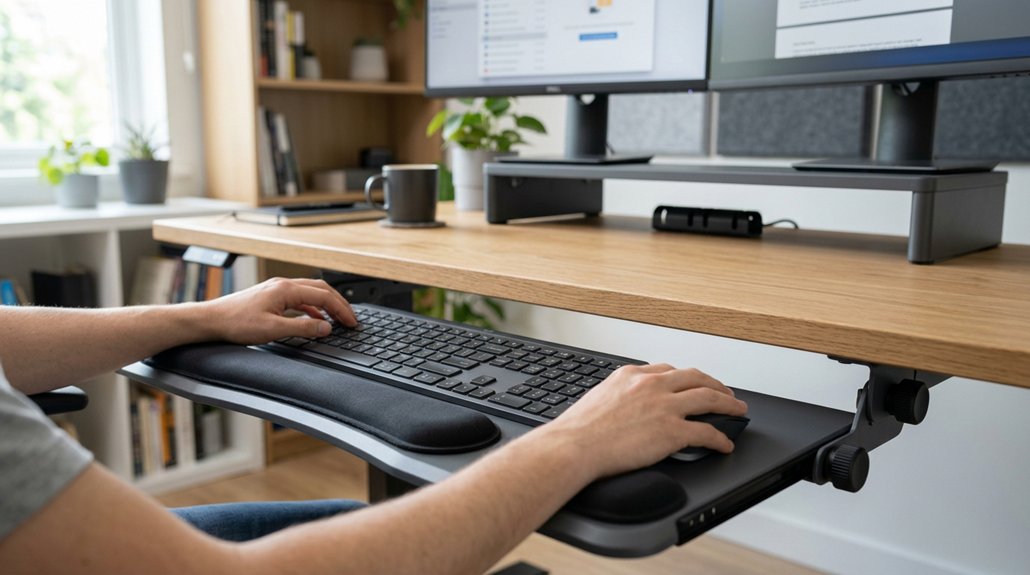
Enhancing your keyboard setup with key ergonomic products can greatly reduce strain and improve comfort during long work hours. Correct keyboard choices, like mechanical keyboards, combined with adjustable keyboard trays, support proper ergonomic height just below your elbows.
Negative tilt (0° to -10°) on trays promotes wrist alignment by preventing extension, helping you maintain a neutral wrist position. Lateral mouse platforms integrated with trays minimize shoulder and neck strain by keeping your mouse close. Wrist support pads that keep your wrists flat and at keyboard height help sustain correct wrist alignment without elevating your wrists, which can increase carpal tunnel pressure.
These products create a workspace that encourages relaxed shoulders, natural posture, and reduces fatigue.
- Adjustable keyboard trays with negative tilt
- Mechanical keyboards on ergonomic trays
- Lateral mouse platforms for close positioning
- Sit-stand workstations for flexible height
- Wrist support pads for neutral wrist position
When and How to Reassess Your Keyboard Setup
Ever wonder when it’s time to reevaluate your keyboard setup? You should do it when you experience discomfort like wrist strain, shoulder tension, or difficulty maintaining a neutral wrist position.
Reassess your keyboard setup if you experience wrist pain, shoulder tension, or difficulty maintaining a neutral wrist position.
After any major workstation change, such as switching chairs, desks, or monitors, reassess to verify your keyboard height still aligns with your elbow height, promoting proper forearm alignment.
When switching between sitting and standing, adjust the desk or tray to keep your keyboard just below your natural elbow height, maintaining ergonomic alignment and a negative tilt of 0° to -10°. If you notice shoulder shrugging or wrist extension beyond 0°, it signals your setup needs attention to reduce musculoskeletal strain.
Use a relaxed posture test—arms close to your sides with elbows at 90-100°—to confirm your keyboard keys sit at the correct height for peak comfort.
Frequently Asked Questions
How Often Should I Adjust My Keyboard Height for Optimal Ergonomics?
You should adjust your keyboard height whenever you feel discomfort or experience strain, typically every few weeks, to guarantee the setup remains ergonomic. Regularly checking your posture helps maintain comfort and prevents repetitive strain injuries over time.
Can Using a Wrist Rest Affect My Keyboard Height Needs?
Using a wrist rest can impact your keyboard height needs by providing additional support, so you might need to adjust your keyboard height slightly higher to keep your wrists in a neutral, comfortable position during extended typing sessions.
Is It Better to Have a Fixed or Adjustable Keyboard Tray?
An adjustable keyboard tray is better because it allows you to customize height and angle, promoting ergonomic comfort and reducing strain. Fixed trays limit flexibility, which can lead to discomfort over time. Adjustability optimizes your setup.
How Do Different Desk Heights Impact Keyboard Positioning?
Different desk heights affect keyboard positioning considerably; a too-high desk forces you to elevate your arms, causing strain, while a too-low desk makes you reach downward, increasing wrist and shoulder discomfort. Proper height promotes better ergonomics and comfort.
What’s the Best Way to Test if My Keyboard Setup Prevents Discomfort?
You should sit comfortably, keep your elbows at a 90-degree angle, and type naturally. If your wrists stay straight and you don’t experience strain or discomfort, your keyboard setup is likely correct and supportive.
In Summary
Ensuring your keyboard is at the right height is key to reducing strain and preventing pain. Take the time to find your ideal setup by adjusting your keyboard, monitor, and chair for comfort. Regularly reassess your workspace to stay ergonomic and avoid discomfort. By making these simple changes, you’ll work more comfortably and efficiently, protecting your body in the long run. Prioritize your posture and setup—your health will thank you.


Leave a Reply