To organize your desk with adhesive cable clips, start by choosing the right size and material to match your cables and surface. Clean the area thoroughly before applying the clips, then press firmly and wait 12-24 hours for strong adhesion. Plan your cable layout for easy access, and adjust clips as needed. Regularly check and reposition clips to maintain organization—these tips will help you keep your workspace tidy and efficient.
Why Using Adhesive Cable Clips Keeps Your Desk Tidy

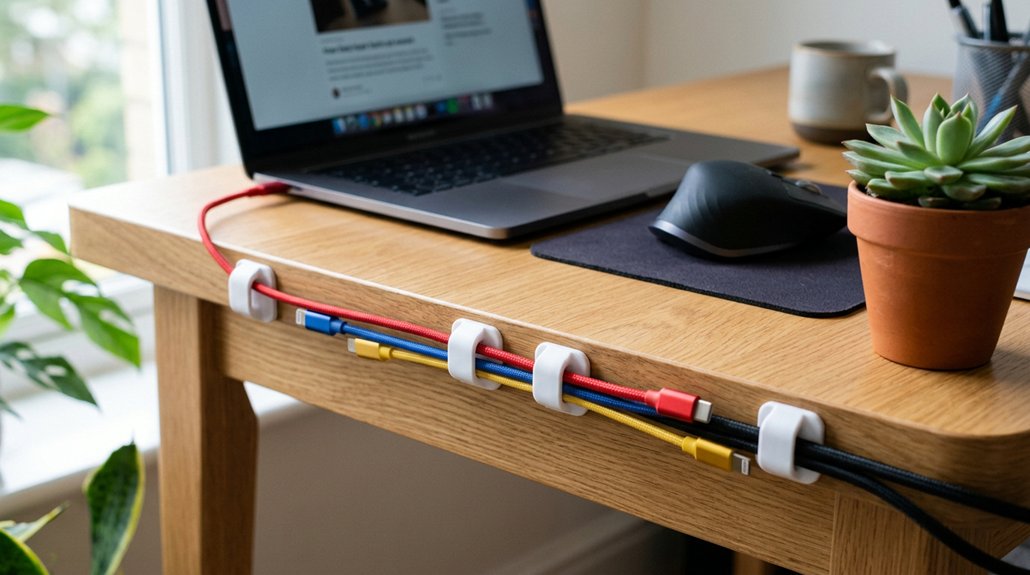
Using adhesive cable clips keeps your desk tidy by securely holding your cords in place, preventing them from tangling or slipping off surfaces. These cable management products are a simple yet effective cable organizer, helping you keep cables neatly routed and accessible.
A strong adhesive ensures they stay firmly attached over time, even with frequent repositioning or exposure to heat from electronic devices.
Plus, they’re easy to install and reposition without damaging your desk surface. Using adhesive clips reduces visual clutter, making your workspace cleaner and safer, and helps keep cables from becoming a tangled mess, ultimately improving your desk cable management with minimal effort.
How to Choose the Right Size and Type of Cable Clips
When selecting cable clips, pay attention to the diameter of your cables to guarantee a snug fit without squeezing or slipping. A fire-retardant material can also enhance safety, especially for cables running near heat sources or in home office environments. Consider the surface you’ll attach them to, making sure the adhesive is strong enough for materials like wall, glass, or wood. Choosing the right size and type helps keep your cables organized and your setup stable.
Cable Diameter Compatibility
Choosing the right cable clip size starts with identifying your cable’s diameter. Measure your cables carefully and select adhesive cord clips designed for that size, like TviewSmart clips for cables up to 6mm, to prevent damage or loose fits. Using the appropriate size ensures optimal material compatibility and maintains safety standards. Multi-slot cable clips with varied sizes (7, 5, 3, 1) help manage different cables and create versatile cable organizers. Magnetic clips, like Sinjimoru, work well for cables between 2.6mm and 4mm diameter, ideal for smaller cords such as USB-C or lightning cables. Avoid using oversized clips on thin cables, which can cause tangling or inadequate hold, and don’t force thick cables into undersized slots. For multiple cables of different sizes, choose options with adjustable or multiple slot sizes to guarantee secure, effective cable management solutions.
Surface Suitability and Adhesion
To guarantee your adhesive cable clips stick securely and last longer, selecting the right surface is essential. Every surface doesn’t work best with adhesive; smooth, clean, and non-porous surfaces like glass, wood, marble, or polished walls provide the best grip. Before applying, always clean the surface thoroughly—wipe away dust, oils, and moisture—to make certain strong adhesive contact. Strong 3M adhesive-backed cable clips offer a firm hold and easy removal without damaging surfaces, making them perfect for rental spaces or delicate furniture. Choosing the right size clip for your cables will also improve adhesion and prevent slipping. Remember, adhesive works best when applied to a prepared surface, so taking these steps will help your cable clips stay secure and your desk organized longer. Additionally, consider the material, surface type, and load capacity of the pegboard or wall you’ll be attaching your clips to, ensuring compatibility for a secure hold.
Preparing Your Desk Surface for Strong Adhesion
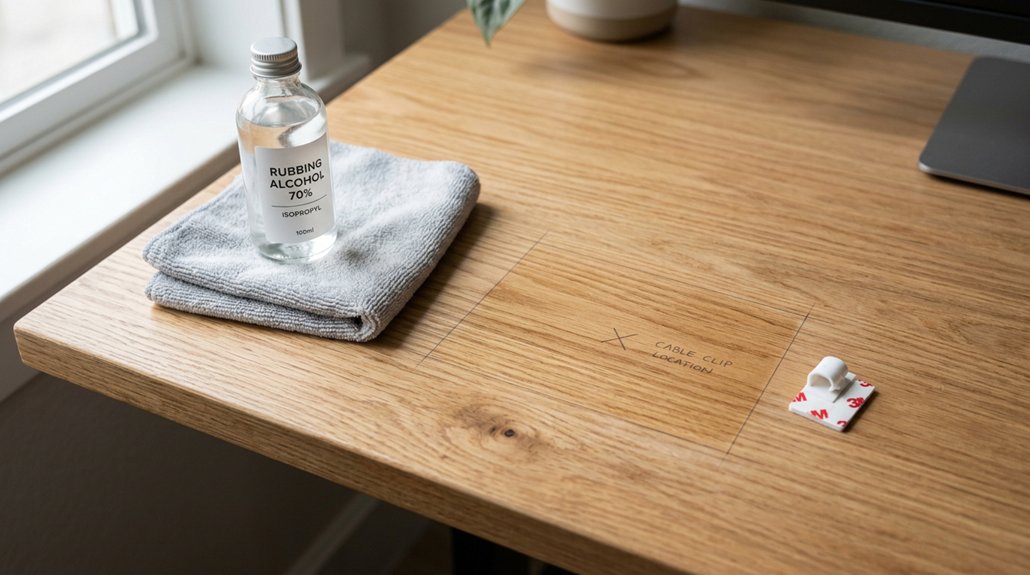
Preparing your desk surface properly is essential for ensuring that adhesive cable clips stick securely. Before applying, keep cords organized and clear the surface of dust, oils, and residues by cleaning with isopropyl alcohol or mild soap. A clean, smooth surface enhances the adhesive bond, ensuring a more durable hold. Make sure the surface before applying is smooth, non-porous, and dry; ideal materials include glass, wood, marble, and polished plastic. Avoid rough, textured, or curved surfaces, as these weaken the adhesive’s grip. Press the clip firmly in place for about 30 seconds to enhance the 3M adhesive bond. Allow the adhesive to cure without cable attachment for at least 12 hours. This preparation makes organizing your cables easy to use, especially under the desk surface, ensuring a strong, long-lasting hold.
Planning Your Cable Layout for Easy Access
Start by identifying which cables you use daily and plan to route them for quick access, so you save time and avoid clutter. A well-organized cable management plan can significantly improve your workspace ergonomic positioning. Map out your desk and underside to determine the best spots for attaching clips on clean, smooth surfaces, ensuring they hold well. Keep frequently used cords, like chargers and headphones, in visible spots and space your clips to prevent tangling and allow for desk movements.
Map Out Cable Routes
Have you ever wondered how a clear cable layout can make your workspace more efficient? To do this, start by mapping out cable routes visually. Identify where your cables start, end, and the most efficient paths to minimize clutter and tangling.
Organize your cables along the edges or underneath the desk surface, where adhesive clips can securely hold them in place on smooth, clean surfaces. Designate separate routes for power, charging cables, and data wires to prevent interference and make each cable easier to access. Utilizing cable management systems can further streamline the process and keep everything tidy.
Leave enough slack to accommodate desk adjustments, such as sitting or standing, and use multiple clips for flexible support. Label both ends of each cable to improve organization and simplify future changes, keeping everything neat and accessible.
Prioritize Frequently Used Cables
Ever wondered how to keep your most-used cables within easy reach while maintaining a tidy desk? Prioritizing the cables you use most helps keep your workspace organized and efficient.
Use adhesive cable clips to secure essential cables like phone chargers and USB cords in accessible spots. Keep these cables within reach by planning clip placement near device connection points and power sources, so they don’t create unnecessary slack.
Use clips with strong 3M adhesive that sticks firmly on smooth surfaces, yet allows clean removal when needed. Consider clips with multiple slot sizes to organize various cable thicknesses and prevent slipping.
For cables that need extra security, zip ties can help keep things tidy. Prioritizing the best placement of high-use cables minimizes wear, stretch, and clutter, making your desk more functional. Incorporating customized organization solutions, like adjustable mesh organizers, can further enhance your cable management system.
Installing and Adjusting Cable Clips for Convenience
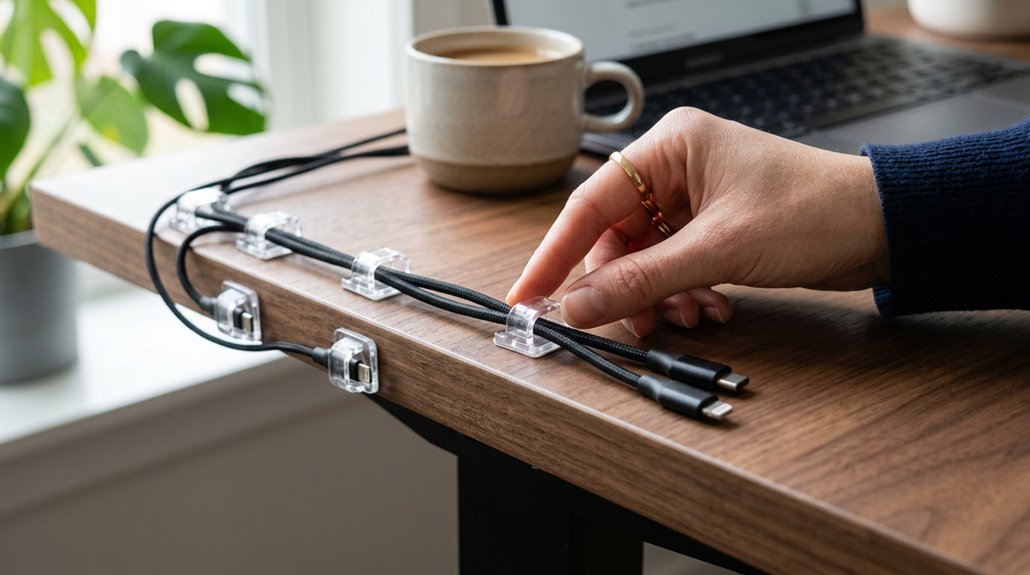
Installing and adjusting cable clips for convenience begins with preparing the surface properly. Clean your desk thoroughly to guarantee the strong 3M adhesive bonds well and allows easy, damage-free removal later. Choose a smooth, flat surface like glass, wood, or marble for peak adhesion.
Place adhesive cable clips strategically at cable entry and exit points, keeping cables within arms reach and away from clutter. This setup helps maintain a tidy desk look and keeps cables off the floor, reducing tripping hazards and tangling.
When adjustments are needed, gently open or close the clips, or reposition them after cleaning the adhesive area and reapplying. Repositioning clips periodically keeps your workspace flexible and organized, with all cables neatly within view and easy to access.
Maintaining and Repositioning Your Cable Management System
Maintaining and repositioning your cable management system guarantees your workspace stays organized and functional over time. To effectively do this:
- Clean the surface thoroughly before repositioning adhesive cable clips to guarantee strong sticking power and reusability.
- When removing clips, peel gently to avoid surface damage and preserve the adhesive for future use.
- Reapply adhesive cable clips only on smooth, clean surfaces like wood, glass, or painted walls for reliable adhesion.
- Regularly check clips in high-use areas for looseness or wear, and reposition or replace them as needed to prevent cable dislodging or tangling.
- Using clips designed for material durability can help ensure they maintain their hold over extended periods, even with frequent repositioning.
Following these tips helps maintain a tidy work area and extends the lifespan of your cable management system, making certain cables stay securely in place.
Troubleshooting Adhesive and Placement Problems
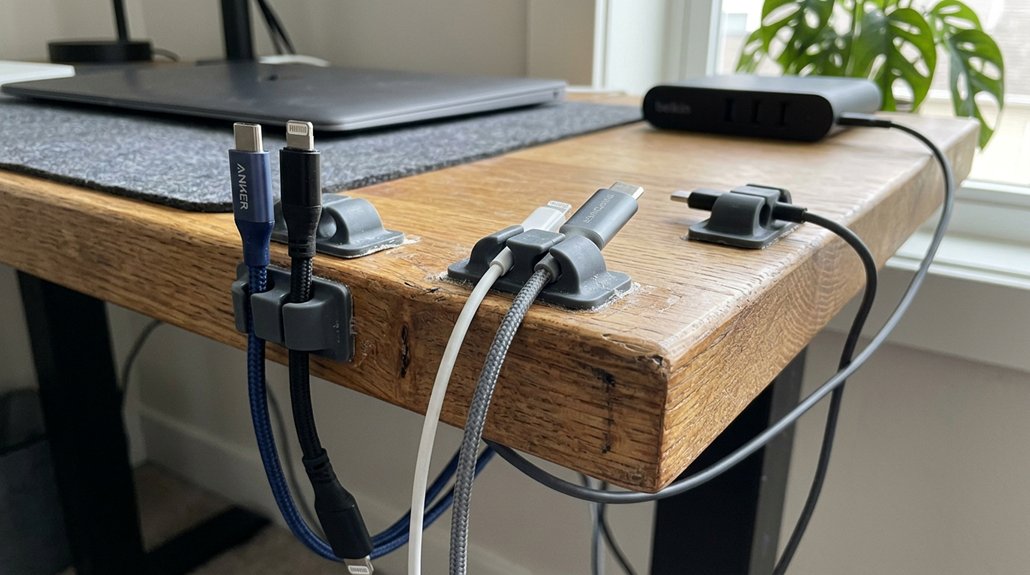
When adhesive cable clips don’t stick as intended, the most common issue is surface incompatibility or surface dirt. Make sure your surface is clean, dry, and smooth—materials like glass, wood, or marble work best. Avoid textured, dusty, or curved surfaces, as these can weaken adhesion and cause clips to detach. Using clips with stronger adhesives or mechanical mounts can improve stability on heavier cables or challenging surfaces. When installing, press firmly for several seconds to activate the adhesive and create a strong bond. Allow at least 24 hours before adding cables to make certain full curing. If you need to reposition clips, do so sparingly, since repeated removals can weaken the adhesive. Some products, like the Anker cable manager, allow up to 10 resticks with cleaning.
Frequently Asked Questions
Do Adhesive Cable Clips Work?
Yes, adhesive cable clips work well if you use a clean, smooth surface and handle them properly. You can reuse many clips multiple times, and they securely hold cables up to 6mm, keeping your desk organized and clutter-free.
How to Keep Cords Organized on a Desk?
To keep cords organized on your desk, use adhesive cable clips to attach cables neatly along edges or underneath. Choose clips that fit your cords, clean surfaces thoroughly, and position clips strategically to prevent tangling and clutter.
What Are the Common Cable Management Mistakes?
You often make cable management mistakes by using clips on dirty or textured surfaces, overloading them with thick cables, not considering adhesive strengths, and neglecting proper routing, which causes clips to fall, cables to tangle, and organization to suffer.
How to Keep Cords From Falling off Desk DIY?
You can keep cords from falling off your desk by using adhesive silicone clips with strong 3M adhesive, placing them near your device ports, and ensuring the surface is clean. Position multiple clips for secure, organized cable management.