Set your chair so your feet are flat and your knees form a 90‑degree angle, then measure the back‑to‑knee gap to determine seat depth, leaving a 2‑4 finger‑width space. Use the rock‑pelvis test to find the lumbar “sweet spot” around L3‑L4, and adjust the lumbar pad’s height and depth until it aligns with that spot without pressing on your tailbone. Re‑check the alignment every 30 minutes and note any tweaks; the next steps will show you how to compare built‑in versus add‑on supports.
Position Seat Height for Proper Lumbar Support (90‑Degree Knee Angle)

How do you set your seat height for ideal lumbar support? Adjust Seat Height until your Foot Position is flat on the floor and your thighs run parallel to the ground, creating a Neutral Posture. Aim for a 90-degree knee angle; this keeps circulation smooth and reduces lower‑back strain. Check the Seat Edge Gap: you should feel a 2–4 finger‑width space between the back of your knees and the seat edge, which helps the lumbar spine stay naturally aligned. After you lock the height, ensure Backrest Contact is firm yet comfortable, without forcing the spine into an awkward curve. Finally, sit for 15–20 minutes, then make a Posture Adjustment if the lumbar region loses contact or feels pressured. This quick routine secures proper Lumbar Support throughout your workday.
Measure Back‑to‑Knee Gap to Set Seat Depth for Lumbar Support
Sit with your hips pressed to the backrest and your feet flat, then measure the distance from the back of your buttocks to the back of your knee. Use that measurement as the maximum seat depth, leaving a 2–4 finger gap at the front edge of the seat. Adjust the seat forward or backward until the gap feels comfortable and your lumbar support aligns with your natural curve.
to‑Knee Gap
Ever wondered why a chair’s seat depth matters for your lower back? Your seat depth hinges on the back‑of‑kutt‑to‑knee measurement, which guarantees proper back support and lumbar alignment. Sit upright, feet flat, knees at 90°, and use a metric tape from the chair’s metal tip to the back of your knee. Aim for a seat edge gap that leaves a 2–4 finger gap; this knee clearance prevents thigh compression and maintains circulation. Record the maximum distance as your seat depth, then subtract 50 mm to set the minimum. This measurement technique translates directly into a chair that supports your spine without sacrificing comfort.
Seat Depth Adjustment
The back‑to‑knee gap you just measured tells you exactly how deep the seat should be to keep your lumbar spine properly supported.
Sit with feet flat and knees at a right angle, then measure from the back of your buttocks to the back of the knee. That measurement becomes your maximum seat depth; subtract about 50 mm for the minimum.
Adjust the seat edge so a 2–4 finger gap remains between it and the back of your knees. This gap ensures the lumbar support aligns with the natural spinal curve around L3–L4 while maintaining proper posture.
Fine‑tune the backrest tilt if needed, but keep the seat depth within the calculated range for optimal lumbar support.
Locate Lumbar Sweet Spot Using the Rock‑Pelvis Test

Sit at the edge of your chair, feet flat, and gently rock your pelvis until you feel a steady, supportive pressure along your lower back. That spot, usually just above the belt line around L3–L4, is your lumbar sweet spot where the spine’s natural curve aligns with the chair. If gaps or pressure appear on your tailbone or upper back, adjust the support height or depth until the rocking feels smooth and consistent.
Find Pelvis Rock Position
Looking for the lumbar sweet spot? Sit at the chair’s edge, feet flat, knees at 90 degrees. Begin the rock‑pelvis test by gently tilting your pelvis forward, then backward, feeling the lower back curve shift. When the spine settles into its natural curve—typically around the L3–L4 region—you’ve hit the pelvis rock position. At that point, the backrest alignment should match the inward curvature without forcing your posture. Note the seat height where this occurs; it becomes the reference for adjusting lumbar support. Set the support 6–10 inches above the seat so it cradles the lumbar sweet spot, preserving the natural lower back curve and optimal spinal alignment.
Identify Lumbar Sweet Spot
Now that you’ve nailed the pelvis rock position, you can pinpoint the lumbar sweet spot. Sit at the seat edge posture with feet flat, then begin pelvis rocking—slowly tilt forward and backward. Notice the moment your spine curvature settles into a comfortable lumbar lordosis; that point marks the natural curve apex, usually around L3‑L4 near the navel. Adjust the back support height so the pad aligns with this spot, and fine‑tune lumbar depth until the cushion follows the curve without pushing you forward or creating pressure points. Maintain continuous contact by checking daily; if comfort wanes, re‑adjust height or depth to keep the lumbar sweet spot supporting your spine’s natural shape.
Set Vertical Height of the Lumbar Pad for Support
Where should the lumbar pad sit to give your lower back the right support? Start by adjusting the seat height, then set the lumbar pad height so it aligns with the natural curve apex of the lumbar region, typically near the L3‑L4 area just above the belt line.
In an ergonomic chair, aim for a vertical height of about 6–10 inches (15–25 cm) above the seat surface. Raise or lower the pad until it nestles into the inward curve without pressing on the tailbone or mid‑back.
Test for 15–20 minutes, then recheck that the pad maintains spinal alignment and comfortable back support. If a gap appears, raise the pad; if it compresses the mid‑back, lower or reposition it.
Find the Right Lumbar Pad Depth for Your Curve
How much pressure should your lumbar pad apply to support your lower back? Aim for a 2–4 cm pressure gap between the pad and your natural spine curve. First, set seat height and backrest angle, then start with the minimum lumbar pad depth. Gently increase depth until you feel consistent back support that contacts the lumbar apex around the L3–L4 region, near the belt line. Adjust the depth so the pad fills any gap in lower back contact without pressing too hard. If the pad feels too aggressive, back off a little; if there’s still space, raise it a bit. After 15–20 minutes of work, re‑evaluate and fine‑tune the depth to maintain comfortable, sustained support.
Check That the Pad Does Not Press on the Tailbone
If the lumbar pad slides too low, it can press directly on your tailbone, causing discomfort and pressure points.
Sit fully back, feet flat, and feel the lumbar pad align with the natural inward curve around the L3–L4 region.
The pad should support a neutral spine without touching the tailbone.
If you notice tailbone pressure, adjust the back support height or seat depth so the pad rests on the mid‑lower back instead.
Make sure there’s a small gap between the pad and tailbone when you lean slightly backward; this prevents lower back pain and encourages a comfortable posture.
After adjusting, sit for 15–20 minutes and verify the pressure stays away from the tailbone during typical typing or reclining.
Test Even Pressure Distribution With a Hand Test

Place your flat hand against the mid‑back of the chair and feel for even pressure across your palm; that’s your hand‑pressure mapping. If the pressure feels symmetrical on both sides, the support is balanced, but any hot spots or gaps signal a need to adjust. Tweak the lumbar height or depth until the hand test shows consistent, uniform contact.
Hand Pressure Mapping
Ever wondered whether your chair’s lumbar support truly embraces your lower back? You can answer that with hand pressure mapping. Place your flat palm on the lumbar region, press gently, and feel the pressure distribution. If the back support follows the natural lumbar curve, you’ll notice uniform contact points across the entire area. Hotspots near the sacrum or mid‑back mean misalignment or a too‑rigid support. During the adjustable‑height phase, repeat the test after each tweak; the pressure should stay even, confirming proper backrest alignment and consistent lumbar curve support.
| Test Step | What to Observe |
|---|---|
| Initial press | Even pressure across lower back |
| After height change | No new hotspots, contact points remain uniform |
| After angle tweak | Pressure stays balanced, lumbar curve stays supported |
Symmetry Check
Wondering whether your chair’s lumbar support is truly balanced? Sit fully back, feet flat, hips neutral, and place your palms lightly along the lower back. Apply equal pressure with both hands, gliding from the left side to the right while maintaining a relaxed seated posture. Notice whether the contact feels uniform or if one side feels firmer.
Even pressure distribution signals proper symmetry and a back support that follows your lumbar curve. If you sense a tilt or uneven firmness, the lumbar support is asymmetrical, indicating a misalignment in chair ergonomics.
Use this assessment to confirm that your chair’s back support distributes weight evenly, promoting comfort and reducing localized pressure during long sitting sessions.
Adjust Support Accordingly
Now that you’ve confirmed the back support is symmetrical, it’s time to test the pressure distribution with a simple hand test. Sit upright, place a flat hand between your lower back and the lumbar support, and press lightly. Feel for uniform contact; any gaps or hotspots mean the support isn’t aligning with your natural spine curve. Adjust the lumbar support’s height or depth, then repeat the hand test at several points. Re‑check after 15‑20 minutes of sitting to ensure the pressure stays even as you shift. Proper seat alignment and backrest height, together with an adjustable lumbar support, give a consistent, comfortable feel.
| Step | Action | Result |
|---|---|---|
| 1 | Place hand under lower back | Detect gaps |
| 2 | Lightly press | Assess pressure distribution |
| 3 | Adjust lumbar support | Achieve uniform contact |
| 4 | Re‑test after sitting | Confirm consistent support |
Adjust Chair Tilt for Lumbar Support While Leaning Back

How can you keep your lower back supported while leaning back? Adjust the chair tilt so the backrest recline rests at about 100–110 degrees. This angle eases spinal disc pressure yet keeps lumbar support engaged.
Set lumbar height so the pad aligns with the natural curve apex near L3–L4, then fine‑tune lumbar depth until you feel a gentle, consistent push—never a pressure on the tailbone.
Use a synchronized recline mechanism; as you lean back, the seat pan rises slightly, preserving a neutral pelvis and constant lumbar contact.
After your initial tweaks, sit for 15–20 minutes, then reassess. If the spinal curve feels supported and the backrest maintains pressure, your tilt and lumbar settings are correctly calibrated.
Lean Back 100‑110° to Test Lumbar Support Comfort
After setting the tilt to a comfortable 100‑110°, lean back and check how the lumbar support fits your lower back. The backrest recline angle of 100–110 degrees should let the pad nestle into your natural curve without pressing the tailbone. If a gap appears, adjust height until the support fills the space and follows the lordotic curve. If it pushes into the mid‑back, raise the pad or shift it upward. Sit with a neutral pelvis and sway slightly; continuous contact means the lumbar support stays aligned. Test comfort for ten to fifteen minutes, then fine‑tune the height and depth. This quick check ensures the chair maintains steady lumbar support throughout everyday movements.
Re‑Measure Lumbar Support After 30‑Minute Intervals
If you’ve set the lumbar pad correctly, you should still re‑measure it every 30 minutes to confirm it stays aligned with the natural curve around L3–L4. Start each 30‑minute interval with a quick posture check: sit upright, keep chair height stable, and glance at the backrest. Verify that lumbar support sits just above the belt line and that depth adjustment offers gentle, consistent contact without pressing the tailbone. During ergonomic testing, note any slouching or discomfort; if they appear, tweak height, depth, or backrest angle and re‑test. Record each adjustment and its effect on spinal alignment. This systematic re‑measurement ensures the support remains effective throughout your work session.
Evaluate Built‑In vs. Add‑On Supports Using Your Measurements
Ever wonder which lumbar solution truly matches your body? Measure your seat depth, seat width, and backrest height, then check the L3‑L4 alignment. If the built‑in lumbar sits 6‑10 inches above the seat and follows your natural curve, the ergonomic chair may already be ideal. If the apex falls short, an add‑on lets you tweak height, depth, and firmness for a perfect fit.
| Feature | Built‑In | Add‑On |
|---|---|---|
| Adjustability | Fixed curve | Height & depth adjustable |
| Comfort | Stable, no movement | Custom firmness |
| Fit | Relies on initial measurements | Fine‑tunes L3‑L4 alignment |
Use your measurements to decide whether the stable built‑in or the flexible add‑on best supports your spine.
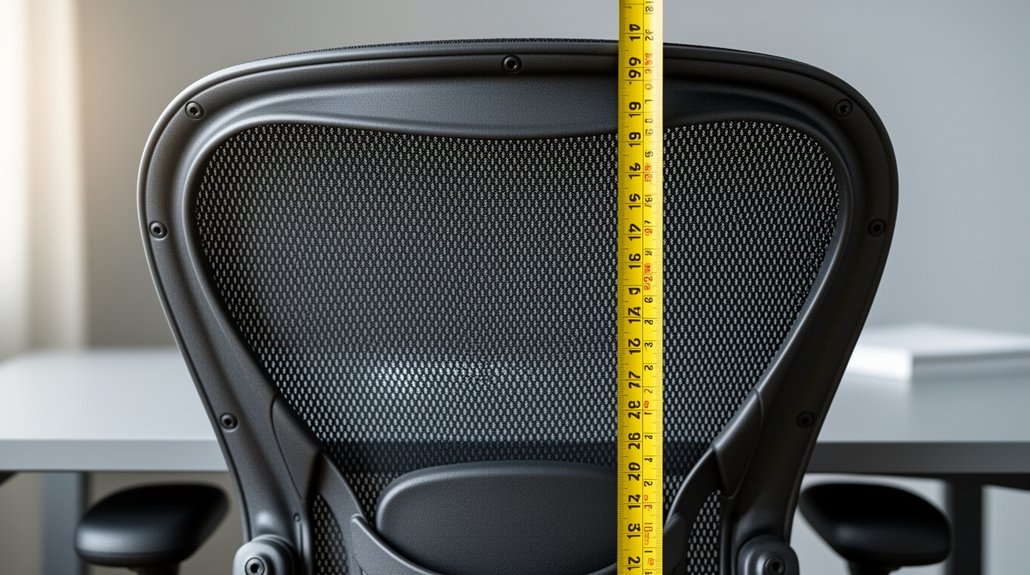
Record Lumbar Support Dimensions With a Tape Measure
How do you capture the exact dimensions your lumbar support needs? Grab a metric tape measure and sit upright with feet flat, knees at about 90°. Place the tape from the back of your buttocks to the back of your knee to note seat depth, then from your seated hip width to record seat width. Next, run the tape from the seat surface up to the navel‑level backrest height that supports the lumbar region around L3–L4. Write each figure in millimeters, and note your body weight in kilograms. These measurements let you compare back support options and fine‑tune an ergonomic chair. Keep the data handy for future adjustments and ensure a snug, comfortable fit.
Take a Posture Photo and Fine‑Tune Adjustments
Now that you’ve recorded your lumbar dimensions, snap a quick photo of yourself seated upright. In the posture photo, check that your shoulders line up with your hips and that the backrest hugs the natural inward curve at the L3‑L4 region. If the lumbar height looks off, slide the cushion up or down until the support sits just under that curve. Verify continuous backrest contact as you shift or recline; any gaps mean you need chair adjustments. Compare the image with future shots to catch slouching or forward‑leaning early. Keep seat depth at two‑to‑four finger widths and maintain a 100‑110° backrest angle to preserve back support alignment and consistent lumbar height.
Frequently Asked Questions
What Chair Is Best for Spondylolisthesis?
You should choose an ergonomic office chair with independent, adjustable lumbar support, a recline that holds lumbar shape, and 4D armrests—ensuring firm L3‑L4 support and a 2‑4 finger seat‑depth gap.
What Chair Is Good for Fibromyalgia?
You should choose a chair with adjustable, breathable lumbar support, soft contouring foam or mesh, height and depth tuning, and a recline that keeps your spine neutral, reducing pressure and pain.
Where Should My Chair’s Lumbar Support Be?
Place the lumbar support about 6‑10 inches above the seat, aligning it with the natural curve at the L3‑L4 level. Adjust depth until you feel gentle, consistent pressure without pushing your tailbone.
Can an Ergonomic Chair Help With Sciatica?
Yes, an ergonomic chair can ease sciatica by supporting your lumbar curve, reducing nerve pressure, and encouraging proper posture; just adjust the lumbar height and stay active throughout the day.
In Summary
By fine‑tuning each measurement—seat height, depth, lumbar pad position and depth—you’ll create a chair that cradles your spine exactly where you need it. Regularly re‑check after a half‑hour of sitting to ensure the support stays spot‑on. Compare built‑in and add‑on options using your own data, and keep a quick tape‑measure log and a posture photo for future tweaks. Consistent adjustments keep you comfortable and protect your back long‑term.


Leave a Reply